Thank you for purchasing this plugin.
If you have any questions that are beyond the scope of this help file, please feel free to email via my user page contact form
here.
WP Media Boxes by castlecode
Video Tutorials | First Steps
This video tutorials will show you the basics for creating your first portfolio
Step 2: Making My First Skin
Step 3: Creating My First Portfolio
Step 1: Installing the Plugin
Step 2: Making My First Skin
You can skip this step and import all the skins from the example folder, see how here
Step 3: Creating My First Portfolio
See some examples on how to create a gallery here
Video Tutorials | Some Examples
Some examples on what you can do with the plugin
Creating a Masonry Gallery Using the Custom Media Gallery
Creating a Masonry Gallery with Custom Post Types
Video Tutorials | Handy Stuff
Some handy stuff
Importing and Exporting
Adding Meta Data To My Posts
Adding Custom Post Types
Creating Multiple Filter/Categories Groups
Installation
There are two ways to install the plugin. Using the Wordpess Plugin Uploader or via FTP. Before intstalling the plugin you need to unzip the downloaded file from CodeCanyon into your computer. Inside you'll find a file named "wp_media_boxes.zip" and a folder named "wp_media_boxes".
Wordpress Plugin Uploader Steps:
- Log into your Wordpress admin panel
- Go to Plugins > Add New
- Click Upload
- Click Choose File and select the "wp_media_boxes.zip" file
- Click Install Now
- Click Activate Plugin
FTP Steps:
- Upload the "wp_media_boxes" folder to the Wordpress plugins folder on your server using FTP (example: htttp://domain.com/wordpress/wp-contents/plugins/)
- Login into your Wordpress admin panel
- Find the plugin and click Activate
Update the plugin:
You should update the via FTP. The process is same as the installation using FTP. DO NOT uninstall the plugin before updating it.Create a Skin
Here you will see how to create your first skin. You can import all the skins from the live preview and skip this section so you can start faster, just go to the Import & Export section.

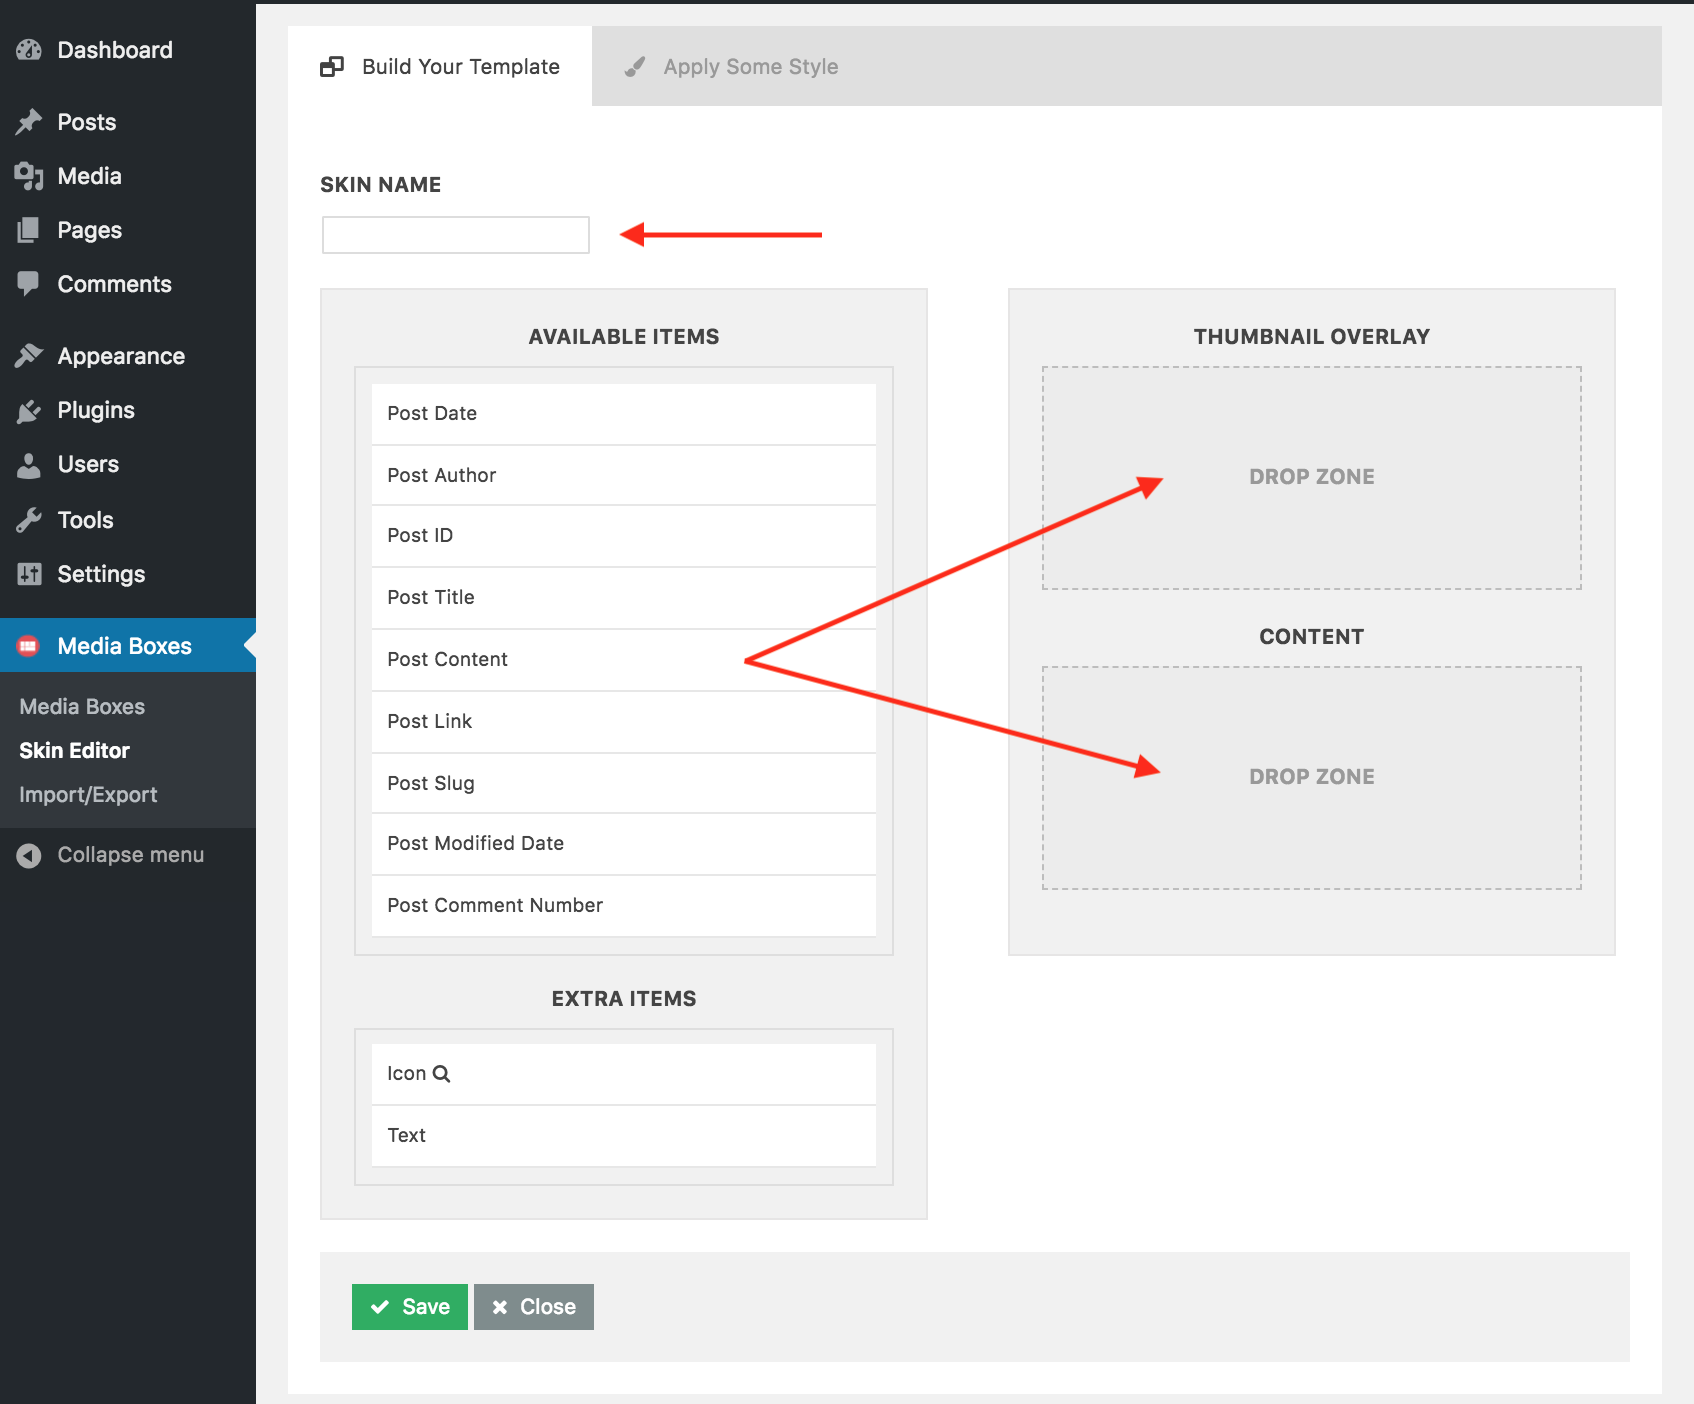
Then you can drag items from the AVAILABLE ITEMS and EXTRA ITEMS sections into the THUMBNAIL OVERLAY and CONTENT sections.
Once you have items in the THUMBNAIL OVERLAY and CONTENT sections you'll notice few options you can play around with. For example:

Here you can apply many different CSS styles to all the items selected in the previous step.
The item you are currently styling is in the top right corner in a dropdown menu (which you can change).
First Step:
Go to the Media Boxes admin panel, through the left dashboard menu and click Skin Editor then click Create a new skin
Second Step:
Enter a new name for your sking (this is for identification purpose in the admin panel).Then you can drag items from the AVAILABLE ITEMS and EXTRA ITEMS sections into the THUMBNAIL OVERLAY and CONTENT sections.
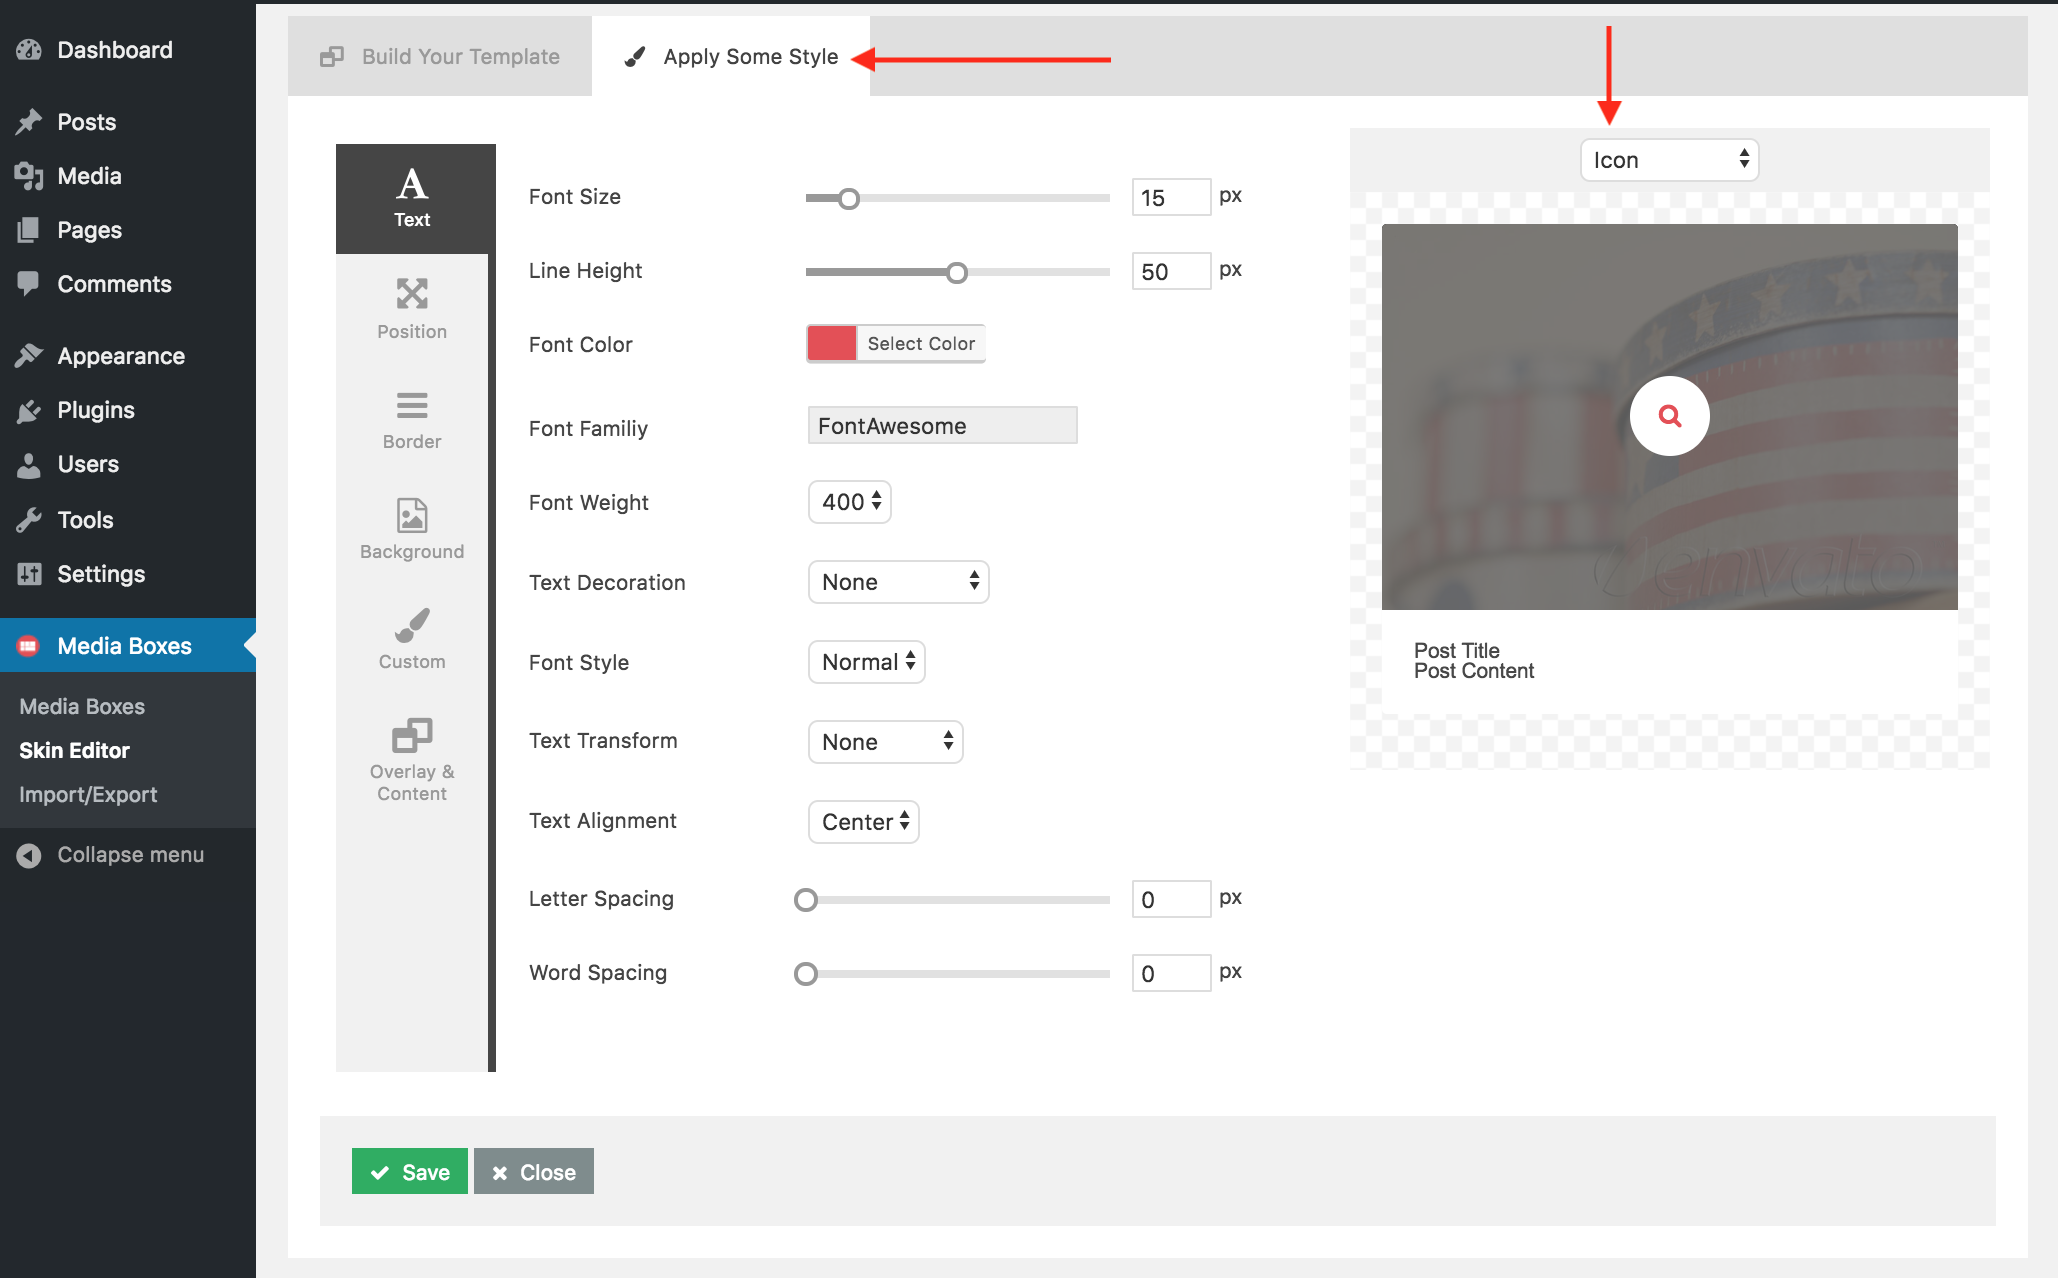
Once you have items in the THUMBNAIL OVERLAY and CONTENT sections you'll notice few options you can play around with. For example:
- Pencil Icon: you can change the icon
- Link Icon: you can set that when the user clicks on that item it links to a different page or it opens the lightbox
- Trash Icon: you can remove the item from the section
Third Step:
Navigate to the Apply Some Style part.Here you can apply many different CSS styles to all the items selected in the previous step.
The item you are currently styling is in the top right corner in a dropdown menu (which you can change).
Final Step:
Don't forget to save it by clicking the green Save button. If you click Close or leave the page the changes will not be saved.Create a Portfolio
Here you will see how to create your first portfolio.
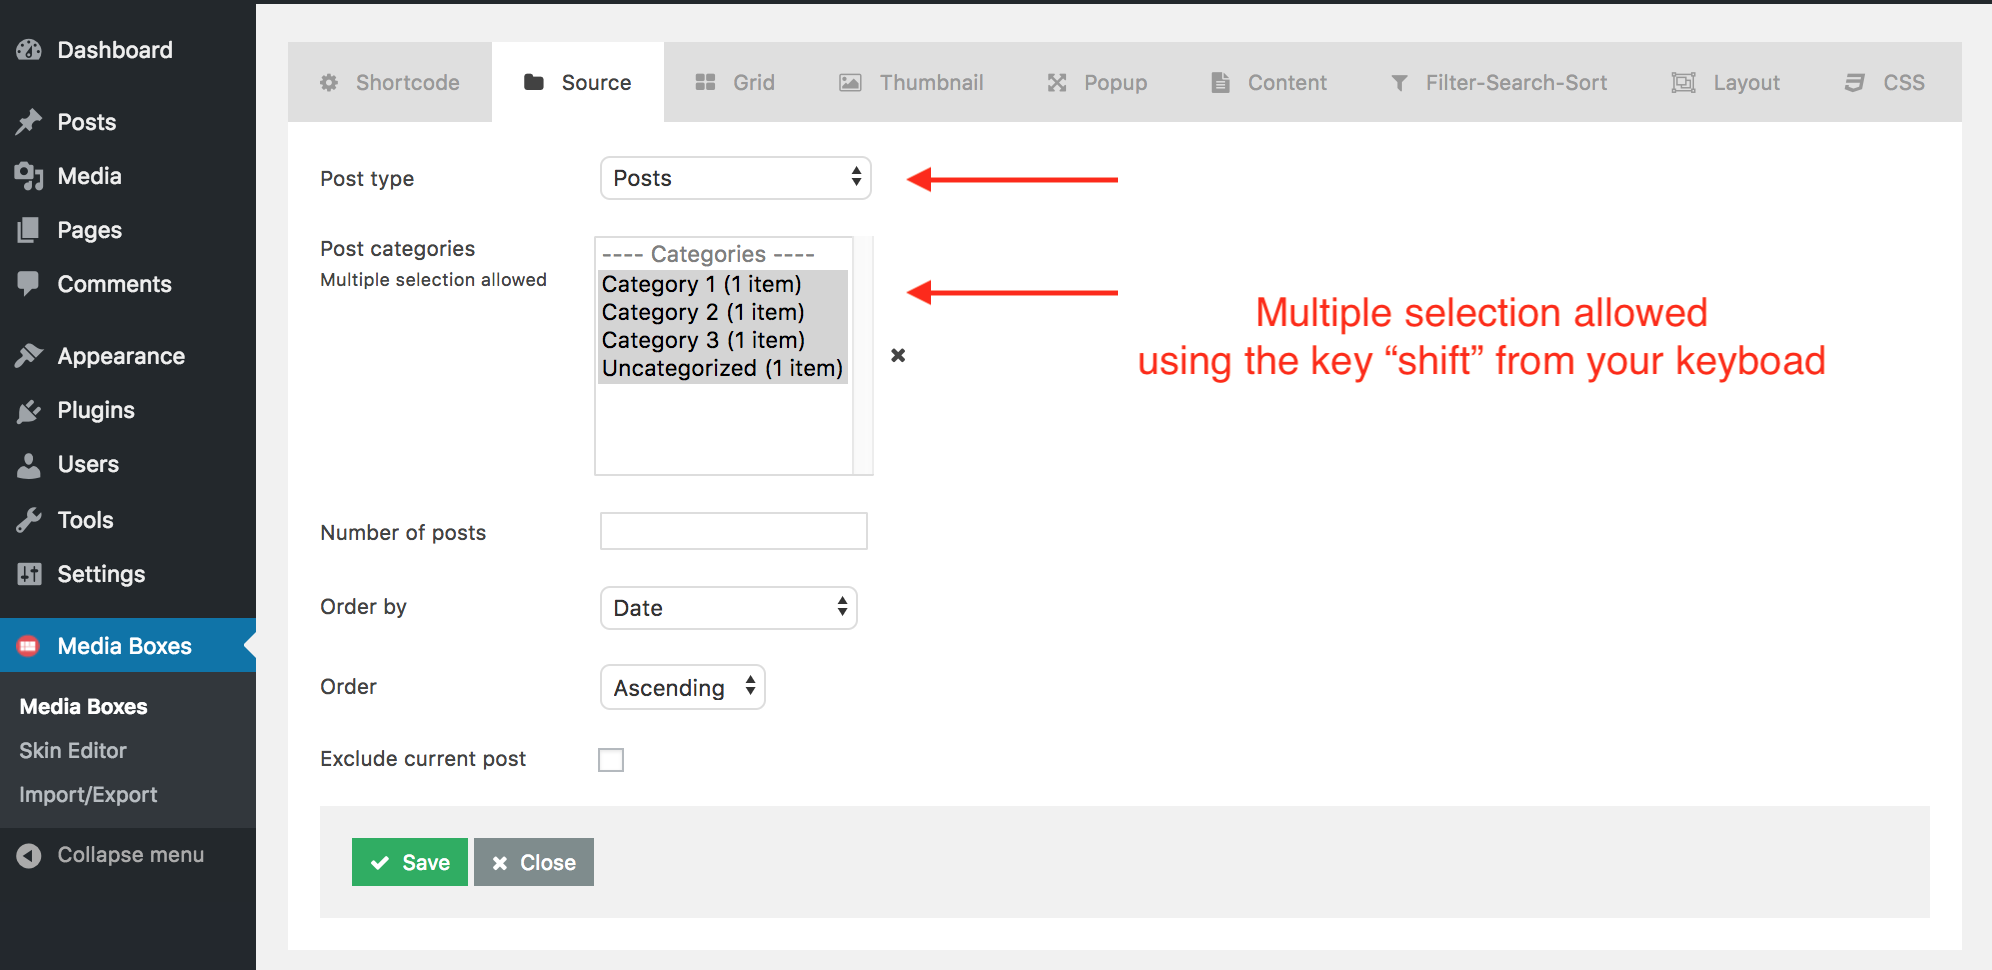
Then select the categories or tags that you wish to use with the plugin, if you don't want to use any then just click the 'x' so all of them are deselected.
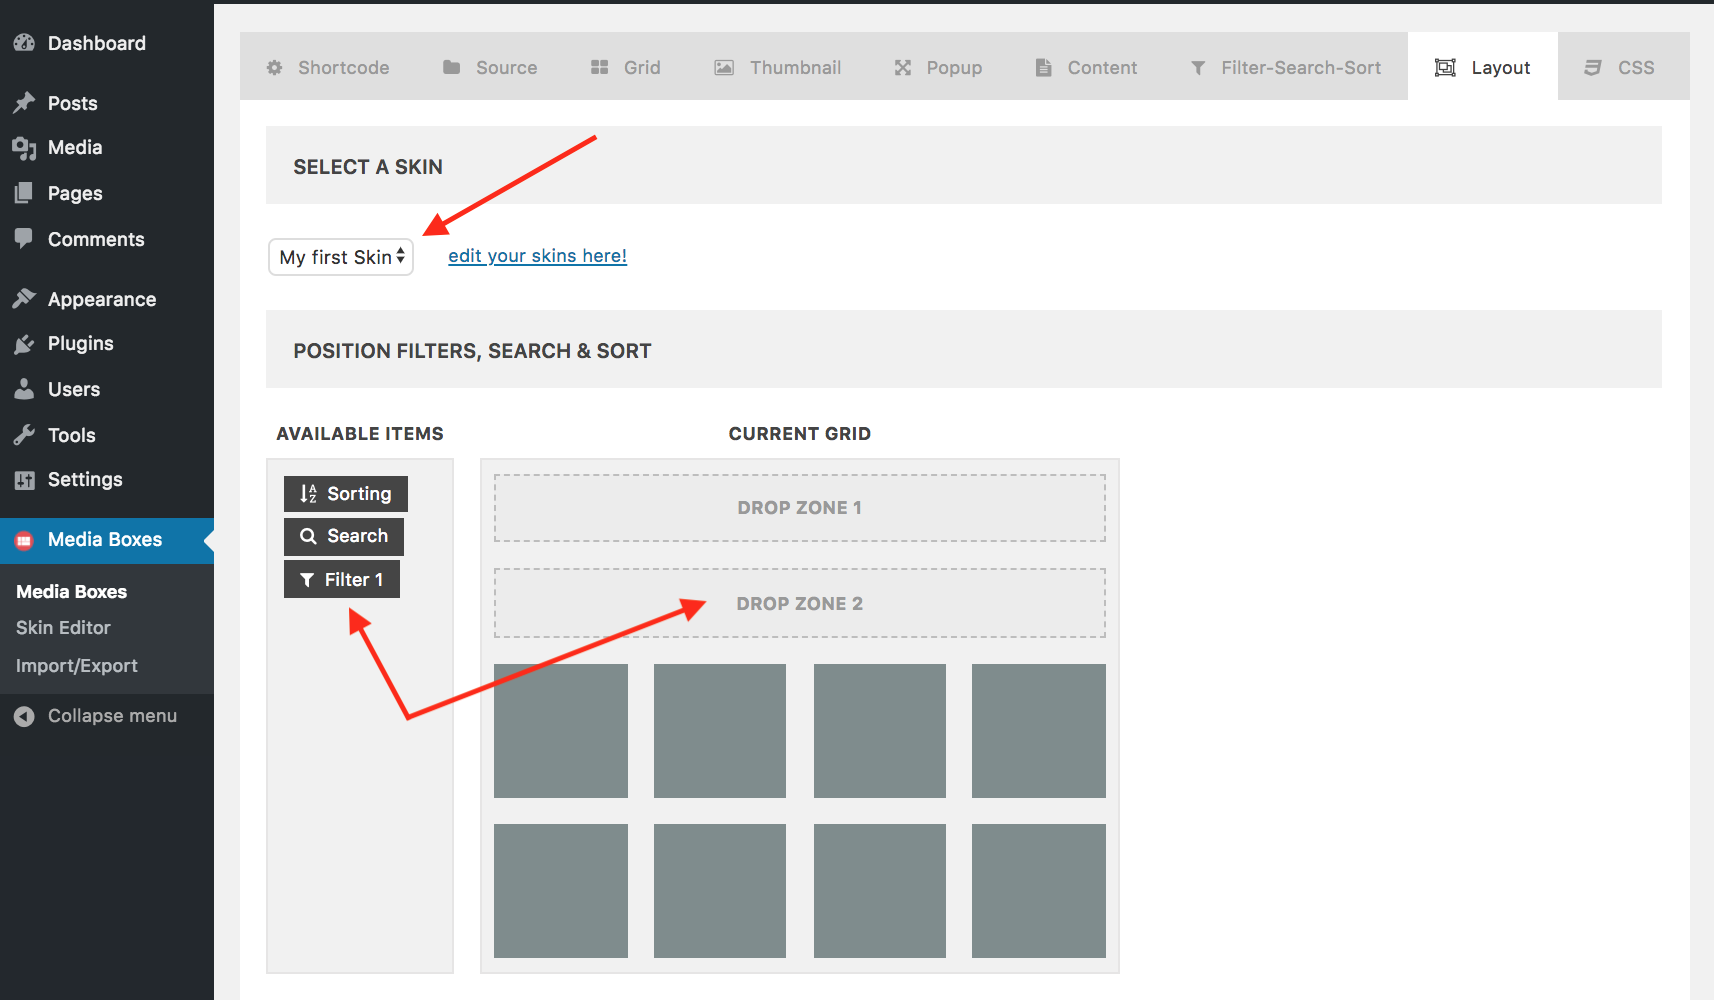
Also you can drag Sorting, Search and Filters so they appear at the top of the portfolio.
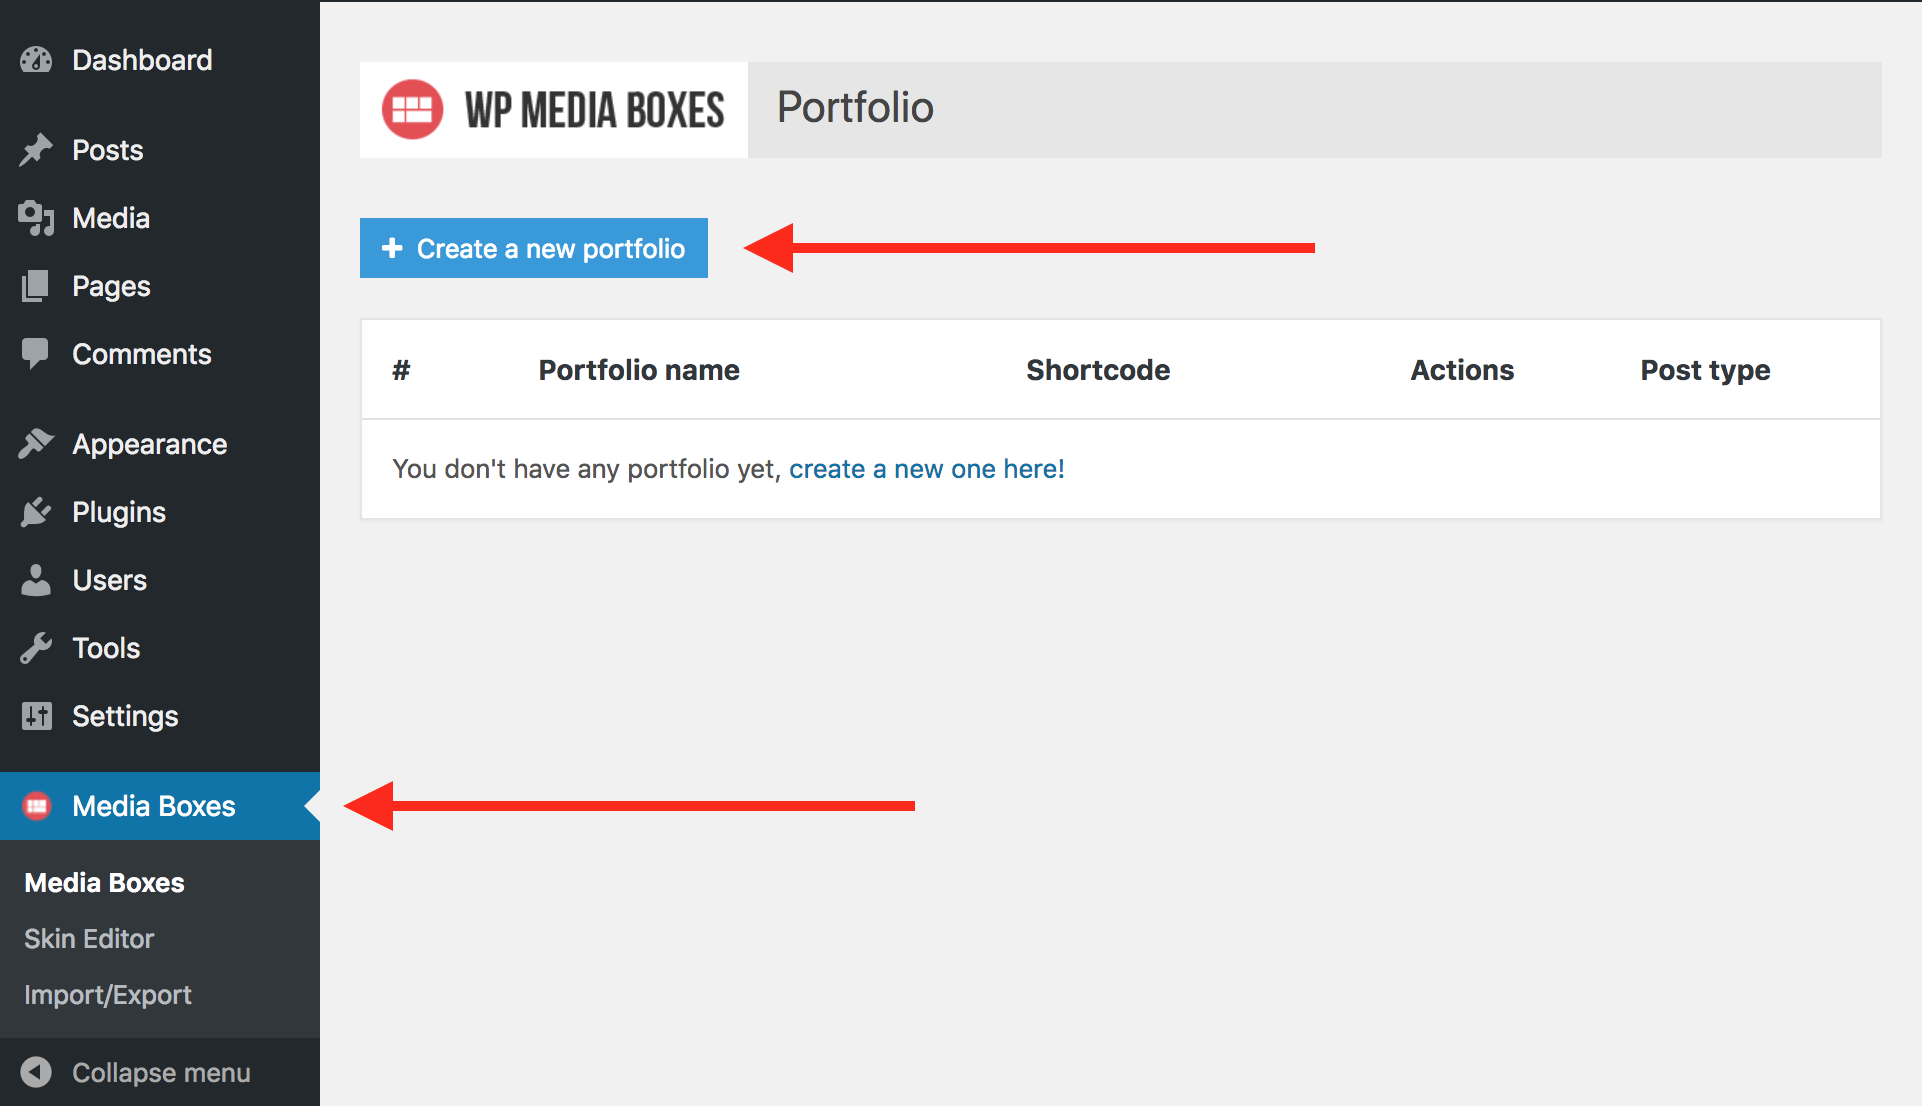
First Step:
You need to go to the Media Boxes admin panel, through the left dashboard menu and then click Create a new portfolio.
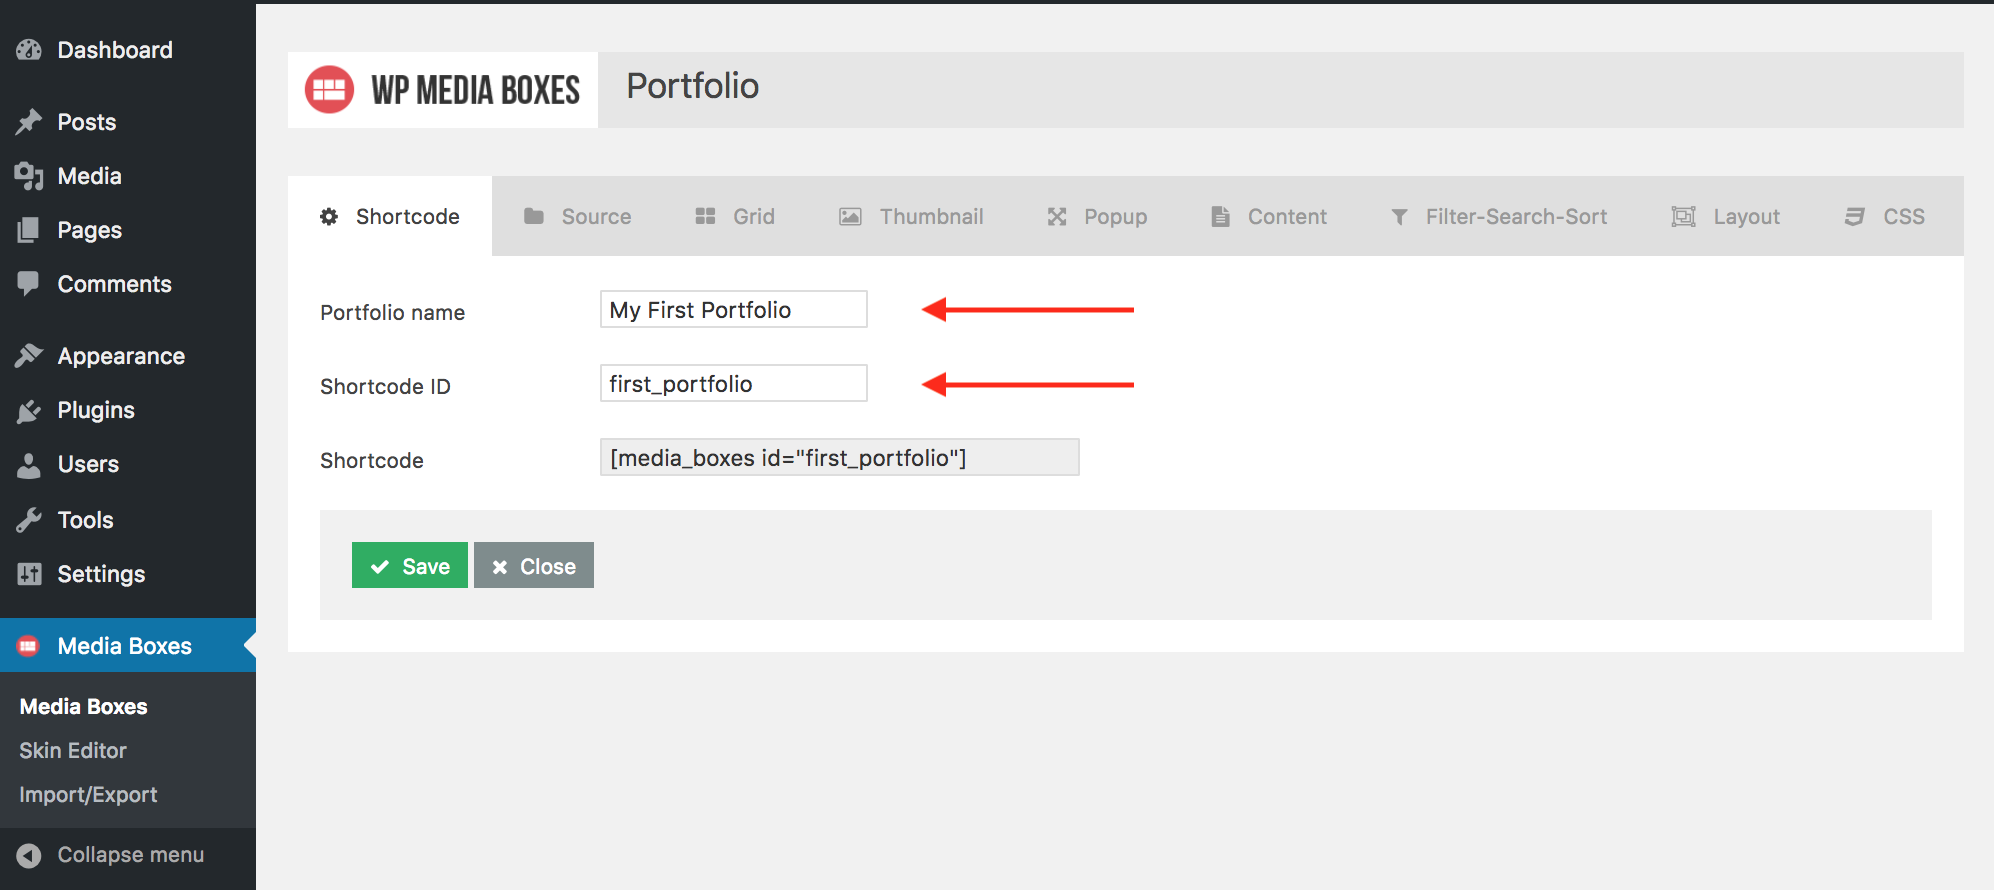
Second Step:
Specify a portfolio name (just for identification purpose in the admin panel) and a UNIQUE shortcode id (which would be used in the shortcode).
Third Step:
Select a Post Type so that the plugin can create the portfolio from that source, the plugin supports custom post types as well.Then select the categories or tags that you wish to use with the plugin, if you don't want to use any then just click the 'x' so all of them are deselected.
Fourth Step:
Select a skin, if you don't have any then import all the skins from the live preview, the plugin WILL NOT WORK without a skin.Also you can drag Sorting, Search and Filters so they appear at the top of the portfolio.
Final Step:
Don't forget to save it by clicking the green Save button. If you click Close or leave the page the changes will not be saved.Insert Portfolios
Here you will see how to insert the portfolio you just created into your pages or posts.

First Step:
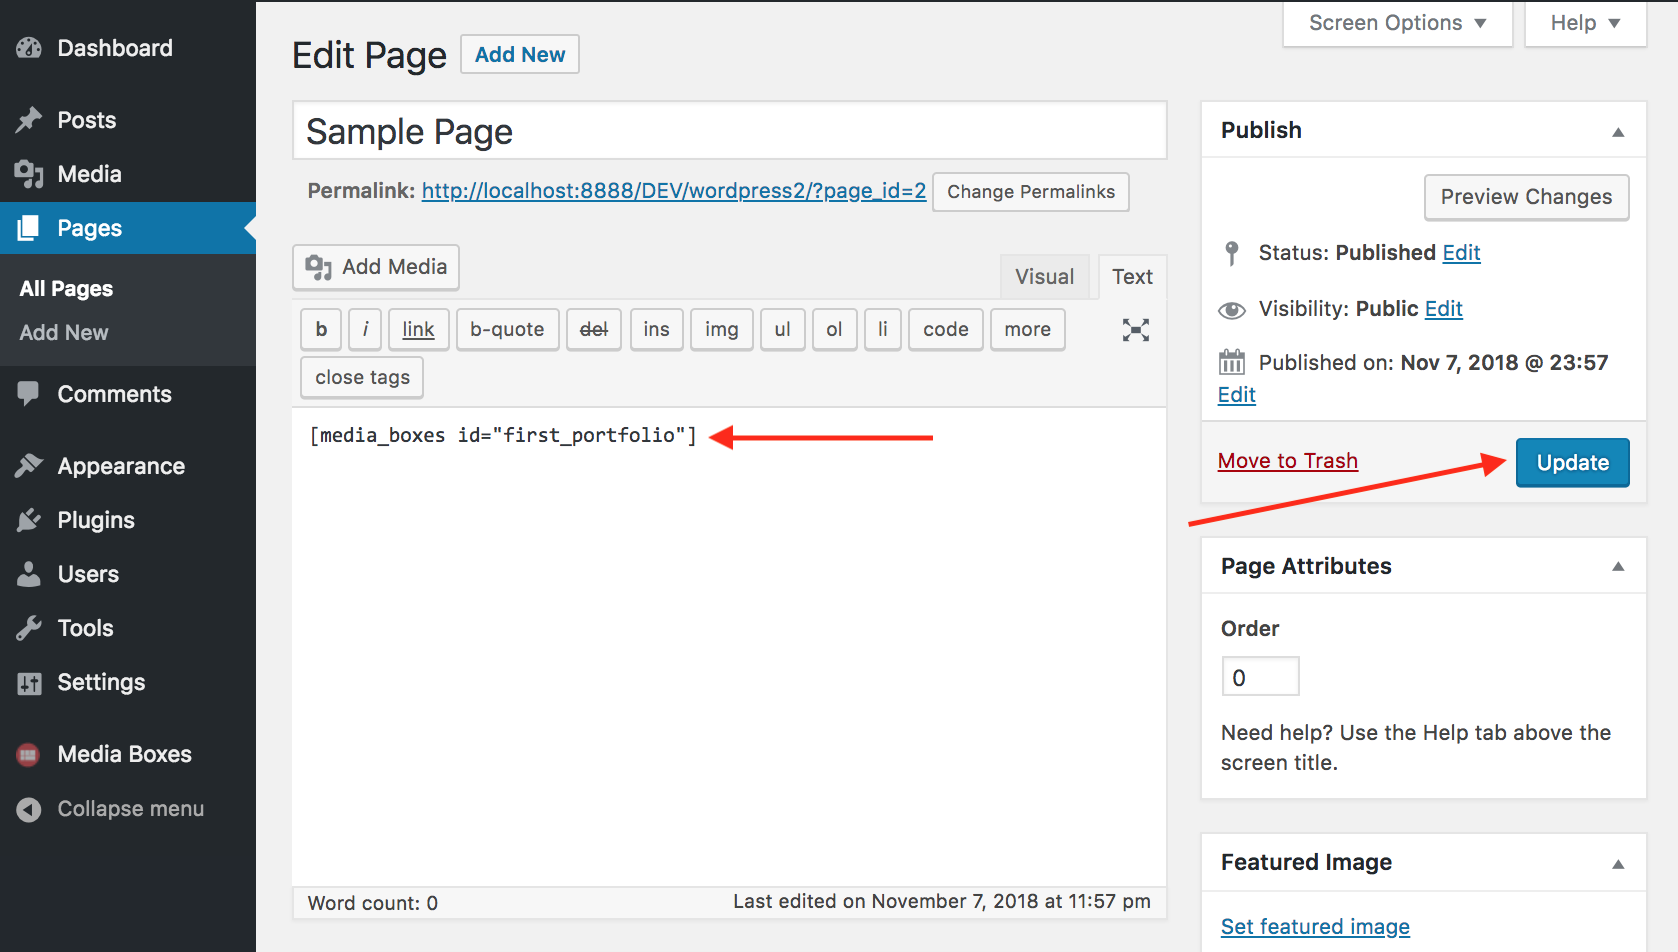
Copy the shortcode of any portfolio
Final Step:
Paste it in any page or post
Portfolio Settings
You can play around with all the options in the admin panel, if you put your mouse over any option you'll see a little description about it, so you know what it does.

Post Meta Data
You can add some Meta Data so you can specify few extra things to each post. You'll find the Meta Data of the Media Boxes at the bottom of your post.

Import & Export
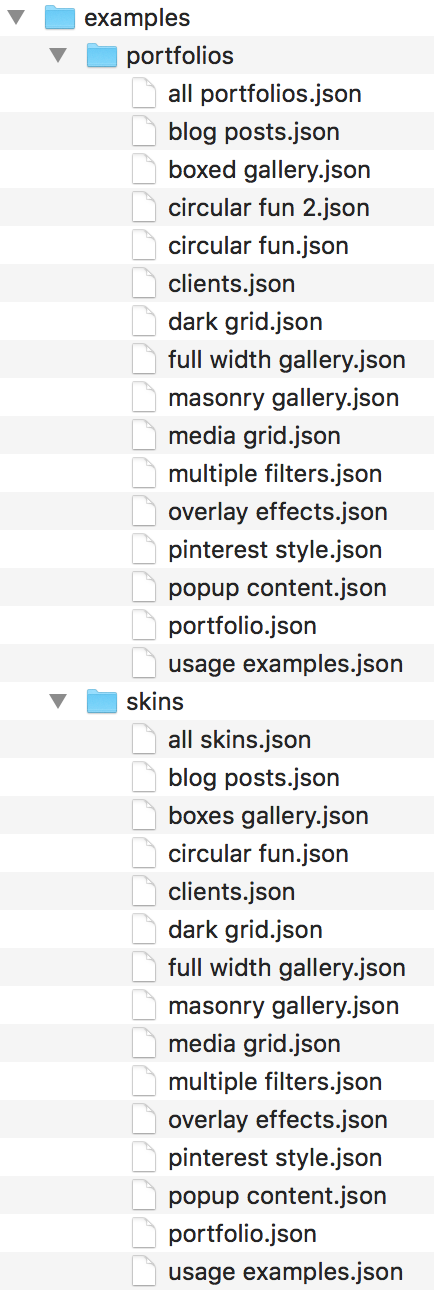
Inside the file you downloaded from CodeCanyon you'll see a folder named "examples" inside that folder you'll find several .json files containing the portfolios and skins of the live preview.
You can import examples by going to the Import/Export option in the Media Boxes admin panel. Then scroll down to the PORTFOLIOS IMPORTER and SKINS IMPORTER section and select a .json file, then just click Import.

Import Portfolios and Skins:
You can import the all portfolios.json and all skins.json files in order to get all the examples into your Wordpress installation, or choose to import only some of them.You can import examples by going to the Import/Export option in the Media Boxes admin panel. Then scroll down to the PORTFOLIOS IMPORTER and SKINS IMPORTER section and select a .json file, then just click Import.
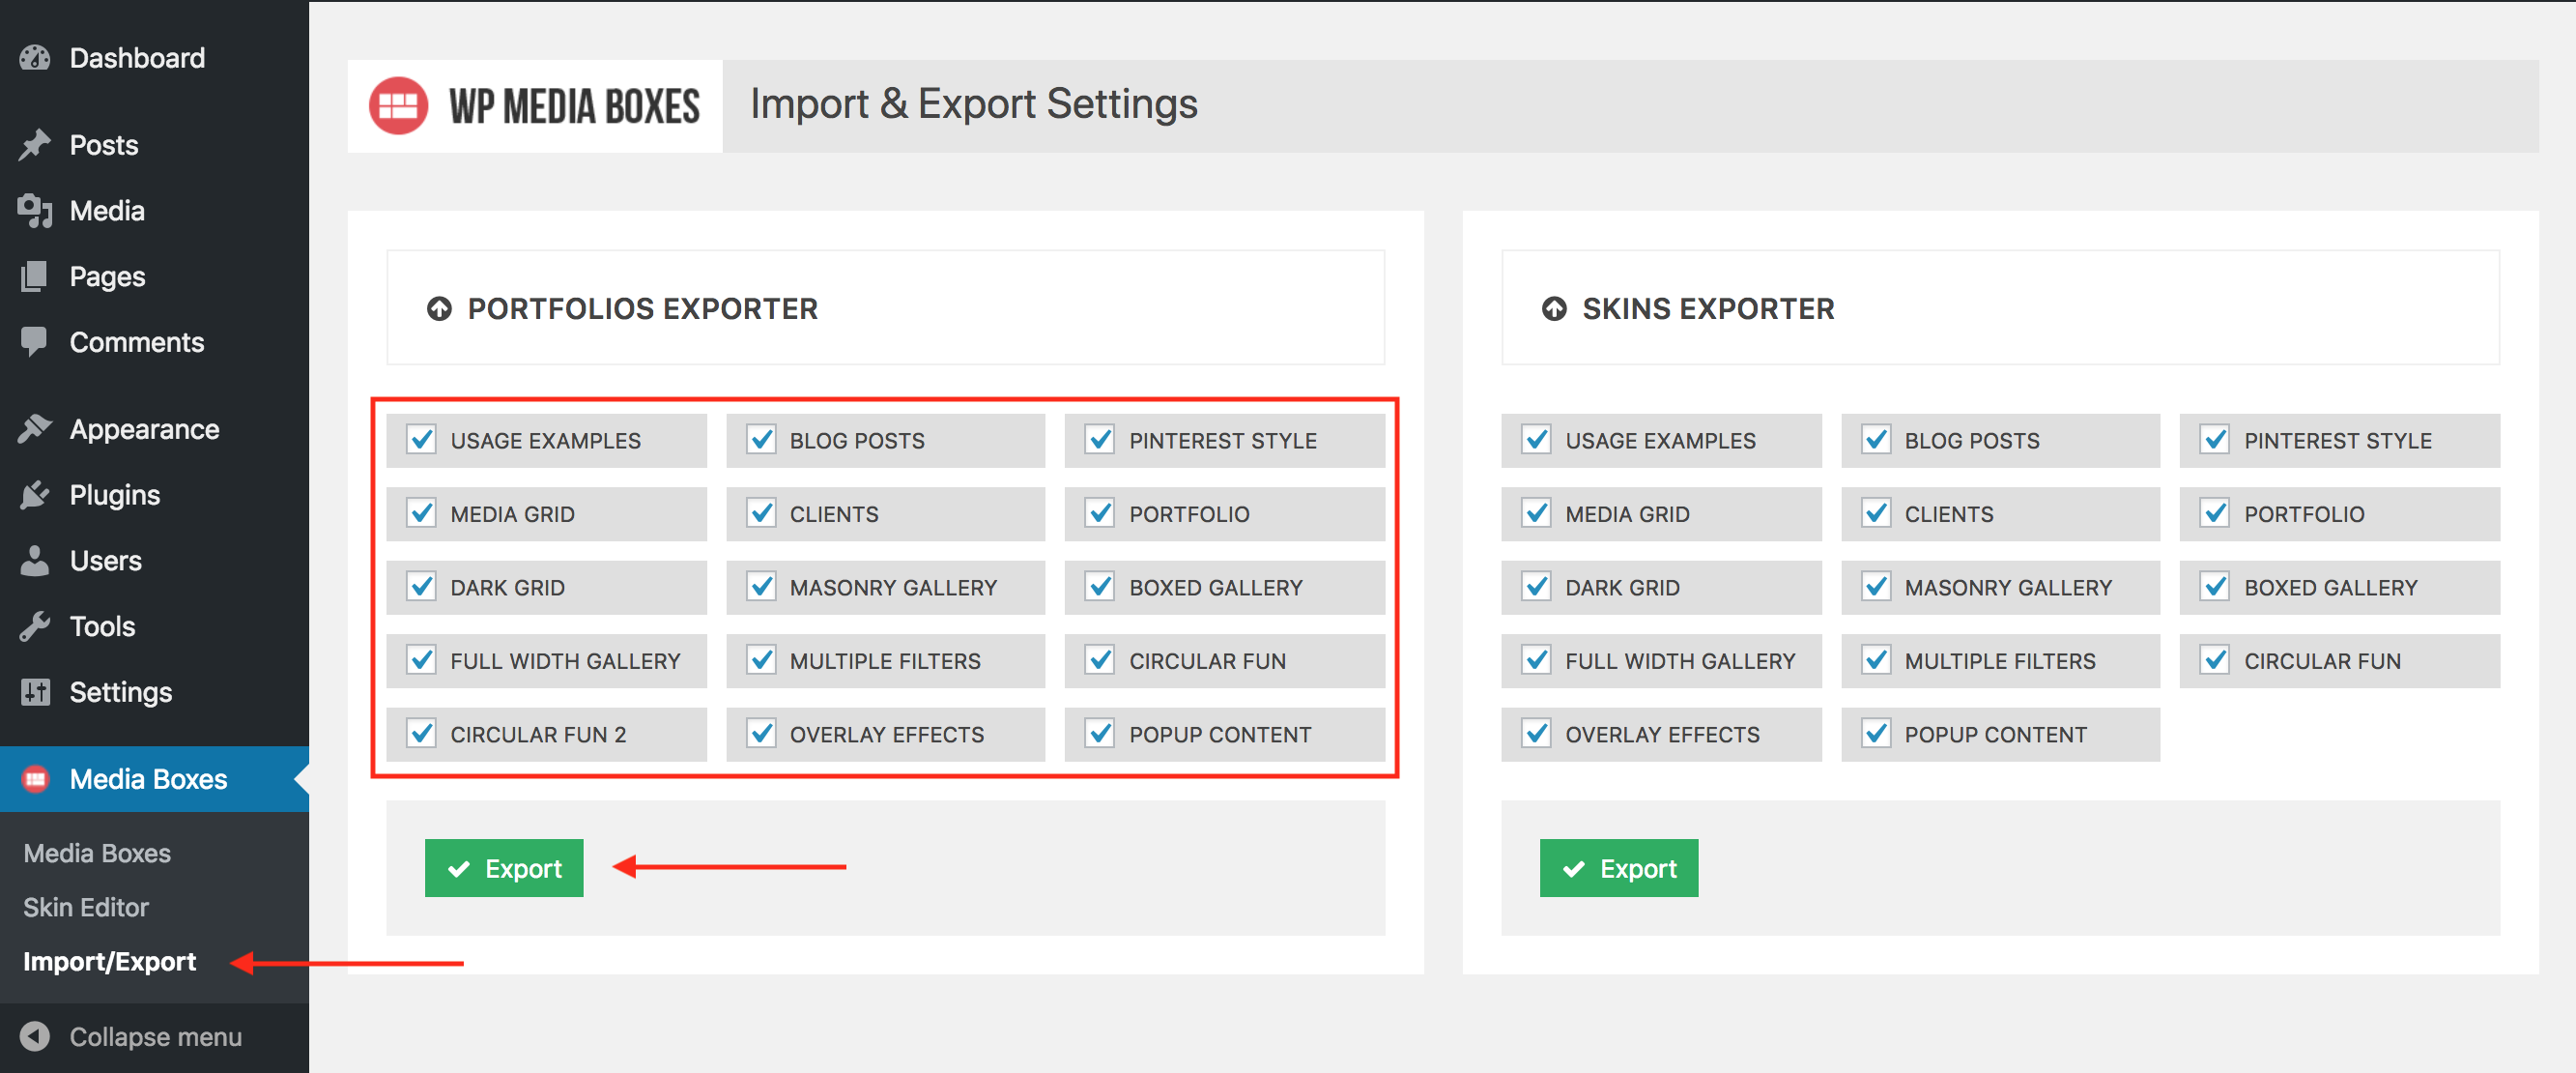
Export Portfolios and Skins:
You can also export your portfolios and skins (in case you wish to import them in another Wordpress installation). In order to do so go to the Import/Export option, choose the portfolios or skins you wish to export and click the Export button. A .json file will be downloaded to your computer.
Custom Post Types
You can add a custom post type and specify it as the source for one of your portfolios.
There are many plugins for adding custom post types to your WP, but I would recommend you this one: https://wordpress.org/plugins/custom-post-type-ui/ just download it and install it in your WP.
There are many plugins for adding custom post types to your WP, but I would recommend you this one: https://wordpress.org/plugins/custom-post-type-ui/ just download it and install it in your WP.
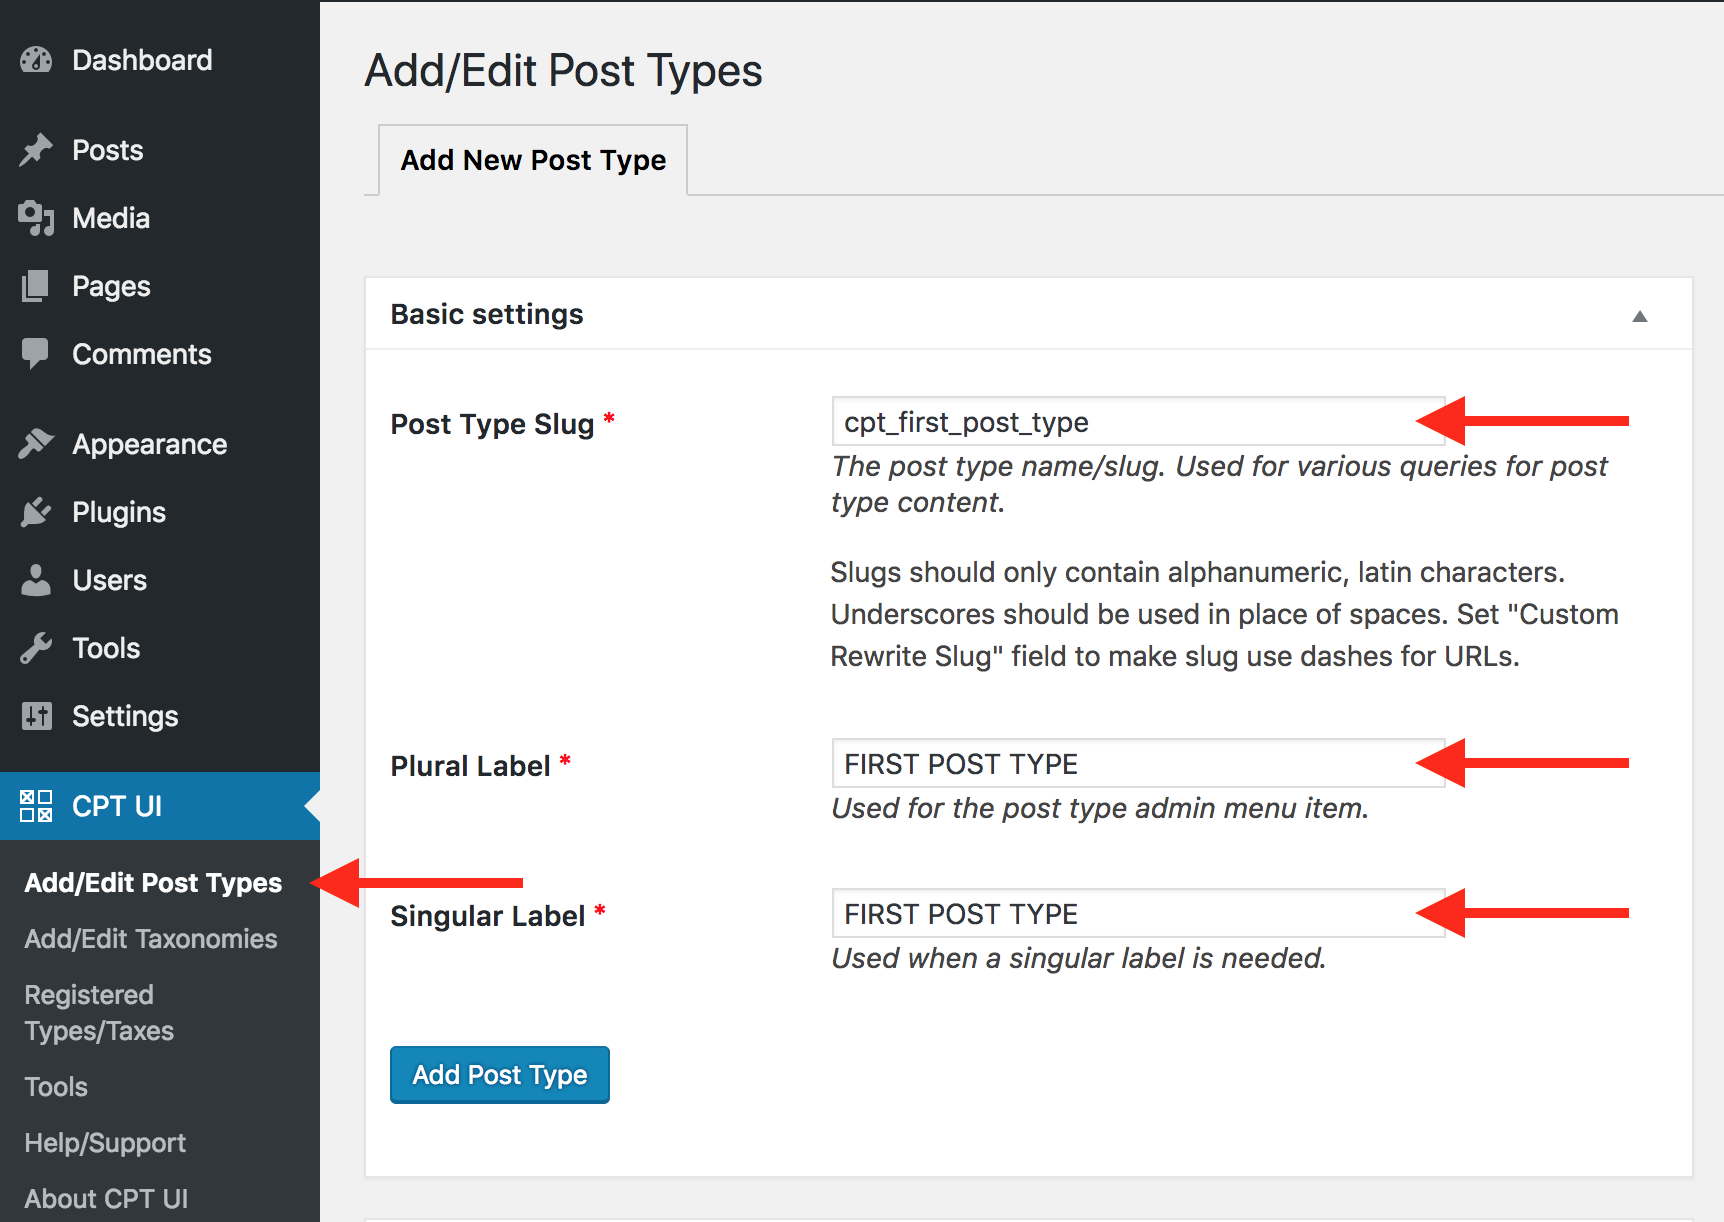
First Step:
Create a new custom post type and fill up the mandatory fields. Make sure that the Post Type Slug is UNIQUE.
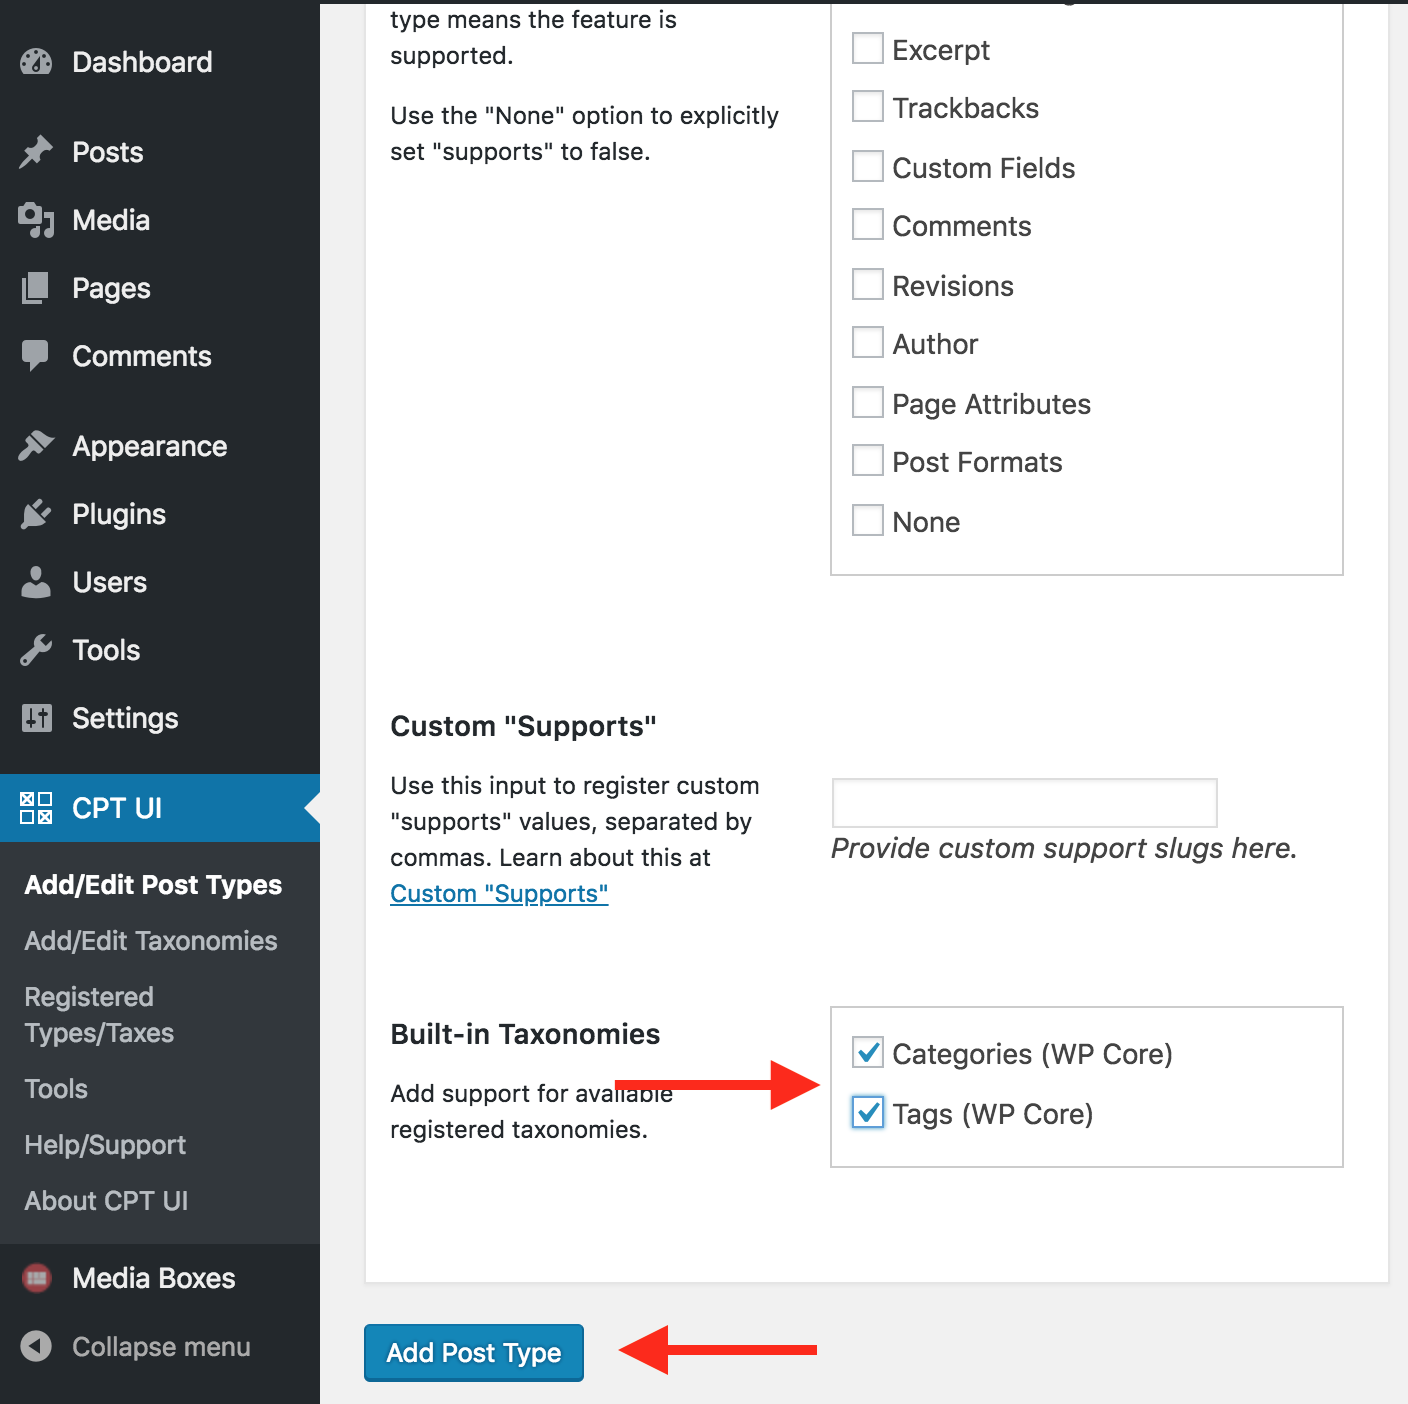
Second Step:
Scroll down and select the built-in taxonomies that you wish to use with this custom post type. Then click Add Post Type.
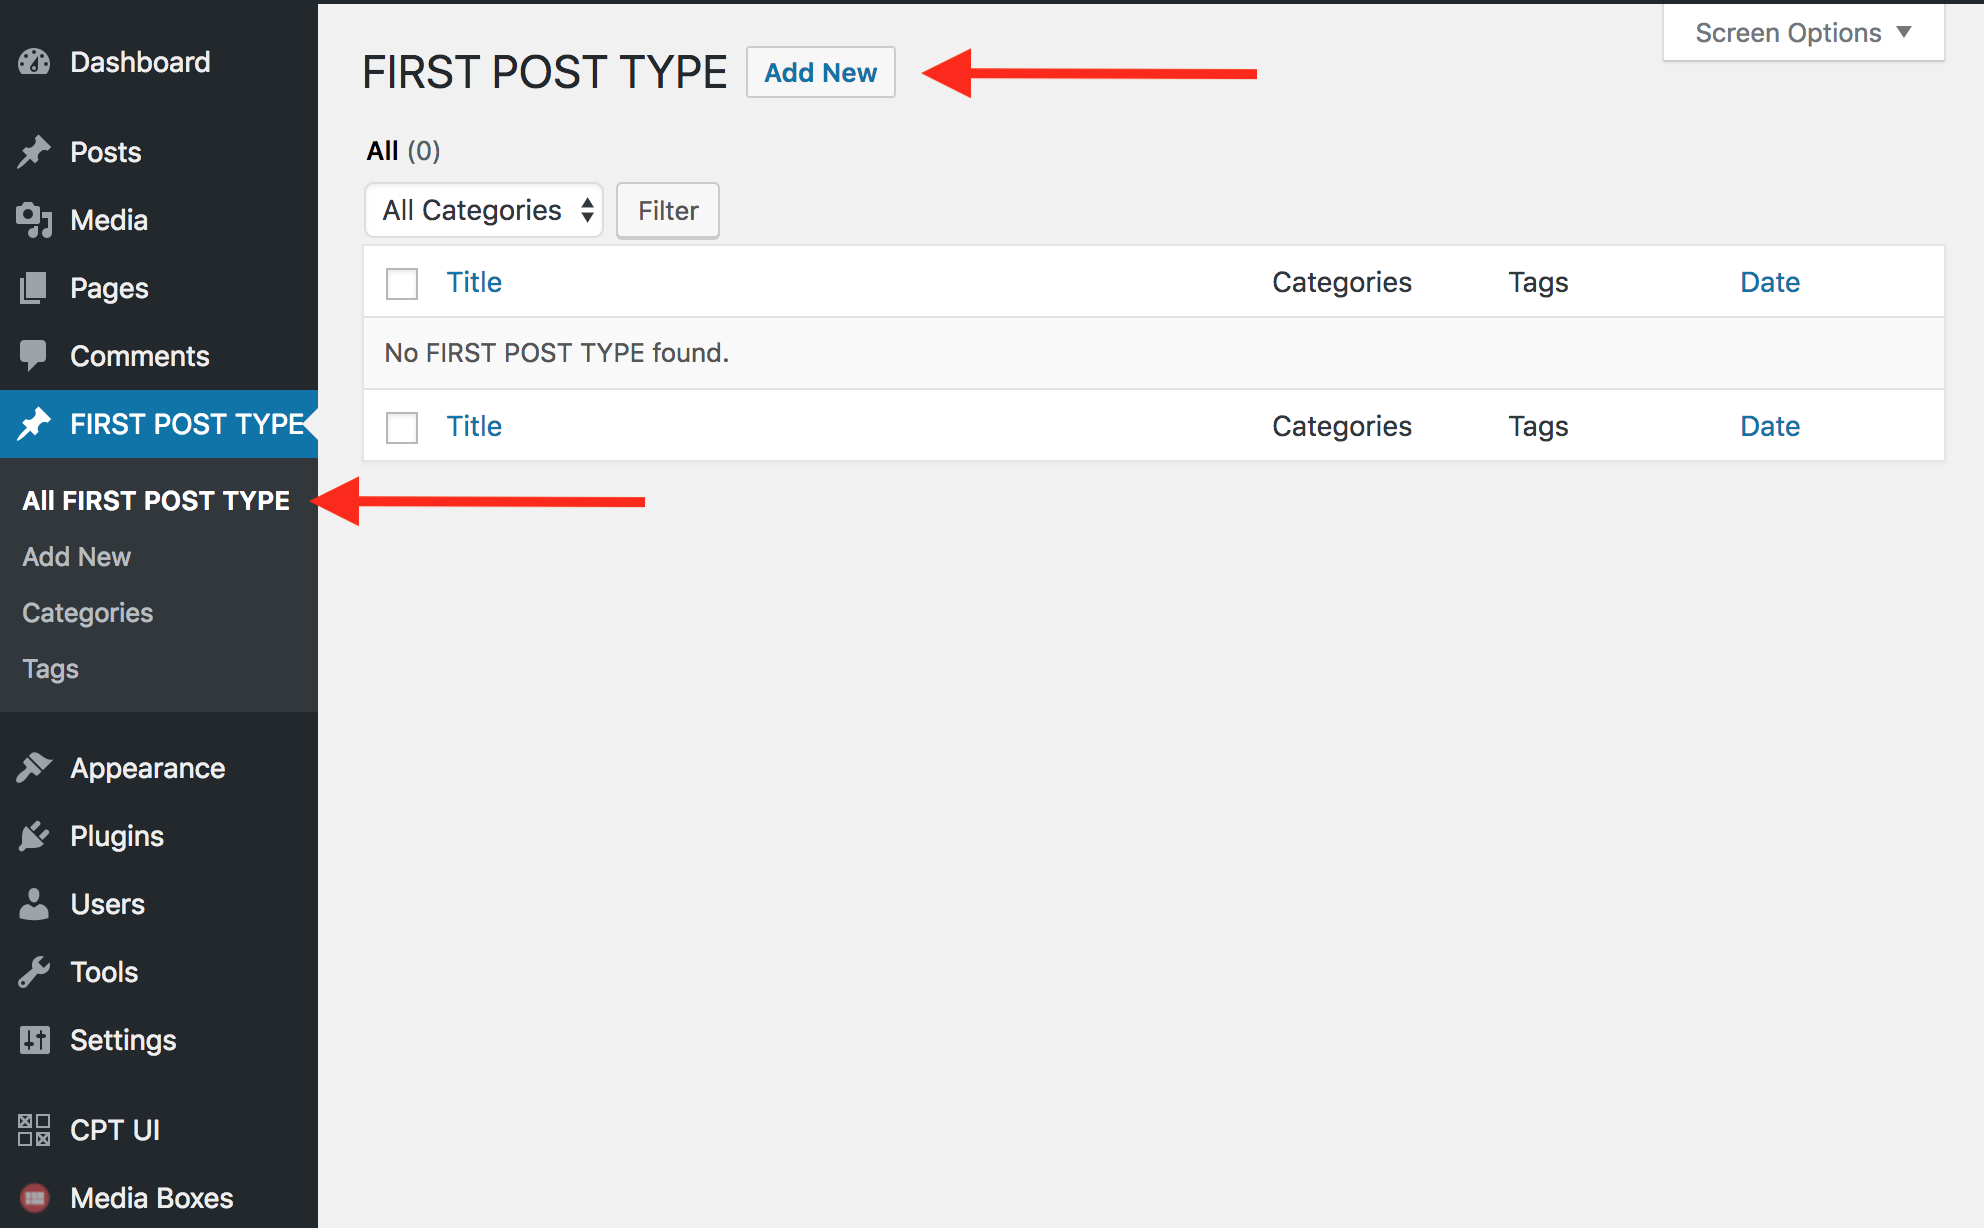
Final Step:
You should see the new custom post type in the left dashboard menu, so just start adding posts.