WP Auto Grid by castlecode
Thank you for purchasing this plugin. If you have any questions that are beyond the scope of this help file, please feel free to email via my user page contact form here. Thank you!
Installation
You need to unzip the file you download from CodeCanyon, inside you'll find a file named "wp_auto_grid.zip". This zip file is the one you need to upload into Wordpress.
To add a WordPress Plugin follow the instructions below
- Go to Plugins > Add New
- Upload wp_auto_grid.zip file
- Click on install Now
- If successful, click Activate Plugin to activate it
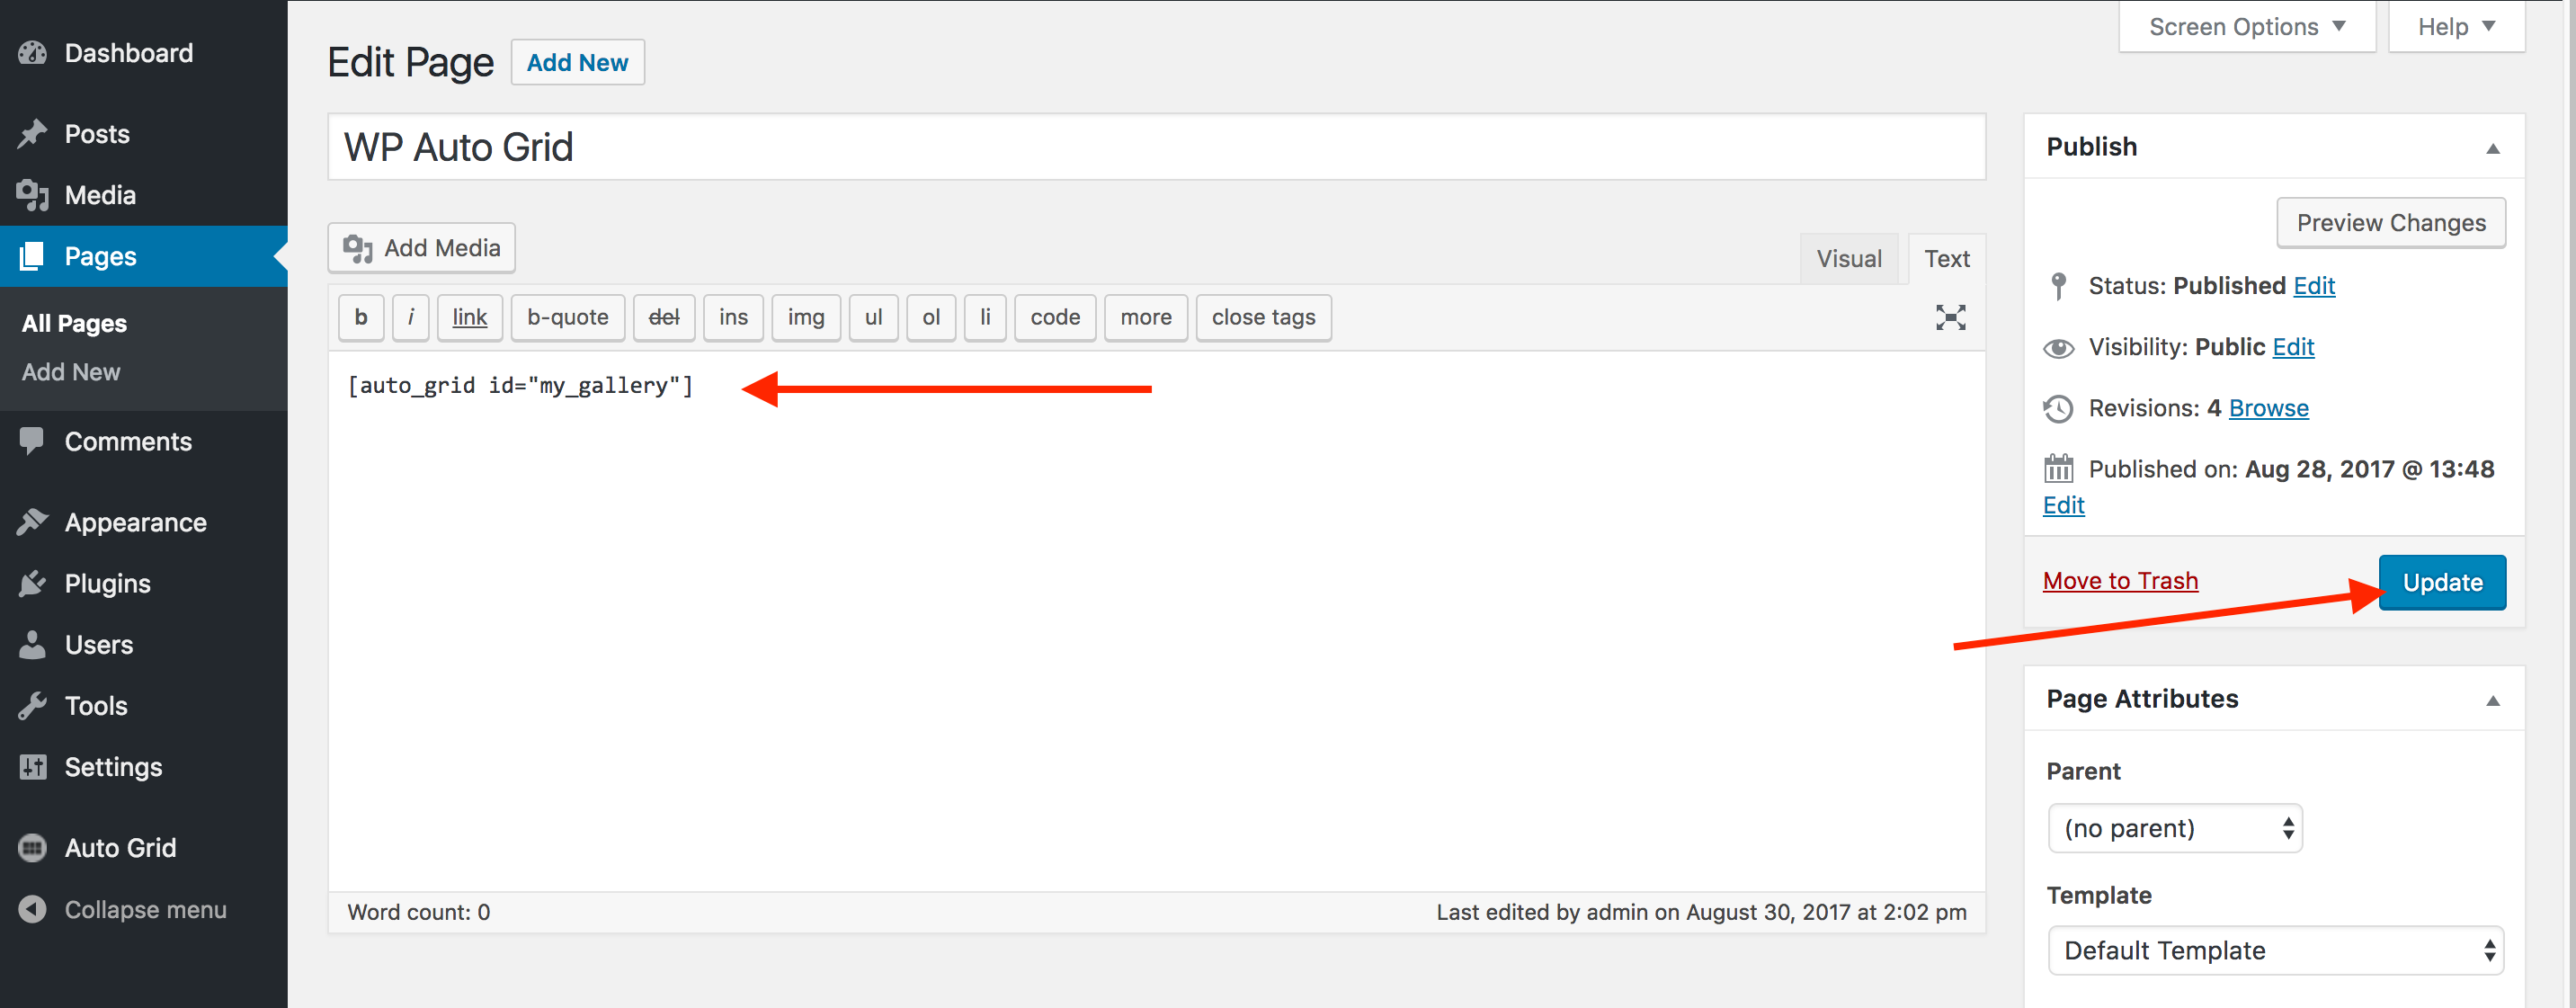
Build a Gallery
First
You need to go to the Auto Grid admin panel, through the left dashboard menu. Then click the "Create a new gallery" button.

Then
Specify a gallery name (just for identification purpose in the admin panel) and a UNIQUE shortcode id (which would be used in the shortcode). Then click "Save".

Finally
Copy the shortcode and paste it in any page or post, in this example the shortcode would be [auto_grid id="my_gallery"]
Drag & Drop images into your folder
You may have noticed, when building your first gallery, an option named "Directory", that's the directory where your images are located, that's the folder that the plugin will use to build the gallery. You can change the directory if you want.
You need to navigate to that directory via FTP, and once inside it you can edit/erase/add images or folders (the folders will be the categories/filters)
No categories and either navigation bar filter
If you don't want categories and either a navigation bar filter, just a grid of images, then you can just drag and drop your images in the gallery folder!
The folder will look like this:
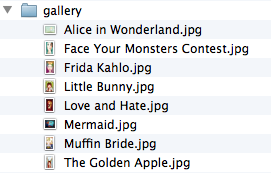
The plugin will take care of reading them, just refresh your page and you will see this images automatically added to the grid!
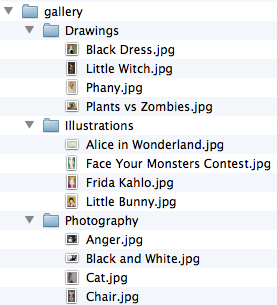
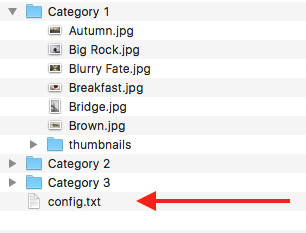
With categories and navigation bar filter
If you want categories, then inside the "gallery" folder you need to create subfolders that will be the categories of your gallery (e.g. Illustrations, Photography, Drawings, etc.) and inside those folders you put the images you want. And that's it, refresh your page and you will see now your gallery with the images you just add with the folders as filters. The caption box that shows when you move the mouse over an image will be the name of the image!
The directory will look like this:
Thumbnails
Now is time to add some thumbnails to each image.
To improve performance you can add thumbnails for the grid and then when you click in one of them the plugin will open a lightbox with the real one. To make a thumbnail just add a folder named "thumbnails" and inside put the thumbnails of your images, the thumbnail must have the same name of the real image so the plugin can recognize it.
For example if you wish to add a thumbnail for an image named "Black Dress.jpg" you will do it like this:
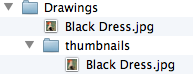
You don't need to add a thumbnail for each image, just for the ones you like.
Config File (.txt)
You can place a .txt file inside your gallery so you can add/edit some extra information about your images, for example, maybe you wish to add a youtube video for some of your images or maybe add some long description or even add an external link.
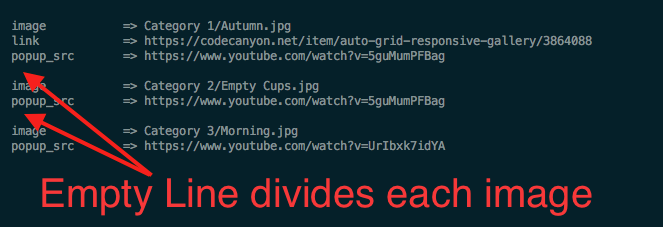
So First place a .txt file inside your folder, for example config.txt, as follows:
Then open it in some text editor and add the following text
image           => Category 1/Autumn.jpg
link            => https://codecanyon.net/item/auto-grid-responsive-gallery/3864088
popup_src       => https://www.youtube.com/watch?v=5guMumPFBag

image           => Category 2/Empty Cups.jpg
popup_src       => https://www.youtube.com/watch?v=5guMumPFBag

image           => Category 3/Morning.jpg
popup_src       => https://www.youtube.com/watch?v=UrIbxk7idYA
This is just an example .txt file, as you can see you need to specify the URL of the image (using the "image =>" variable) and then below you can add some extra variables to it, like link, popup_src, ratio, etc
Also the empty lines between images is very important so the plugin can differentiate between several images, you can use 1 or 2 or 3 empty lines between each image! as follows:
All the available variables you can use per image are the following:
image           => Category 1/Autumnn.jpg
link            => https://codecanyon.net/?param=param
extra_filter    => Category 2, Category 3
name            => My Image Name
thumb_src       => Category 1/thumbnails/Autumnn.jpg
ratio           => 1x1
popup_src       => https://www.youtube.com/watch?v=5guMumPFBag
popup_type      => iframe
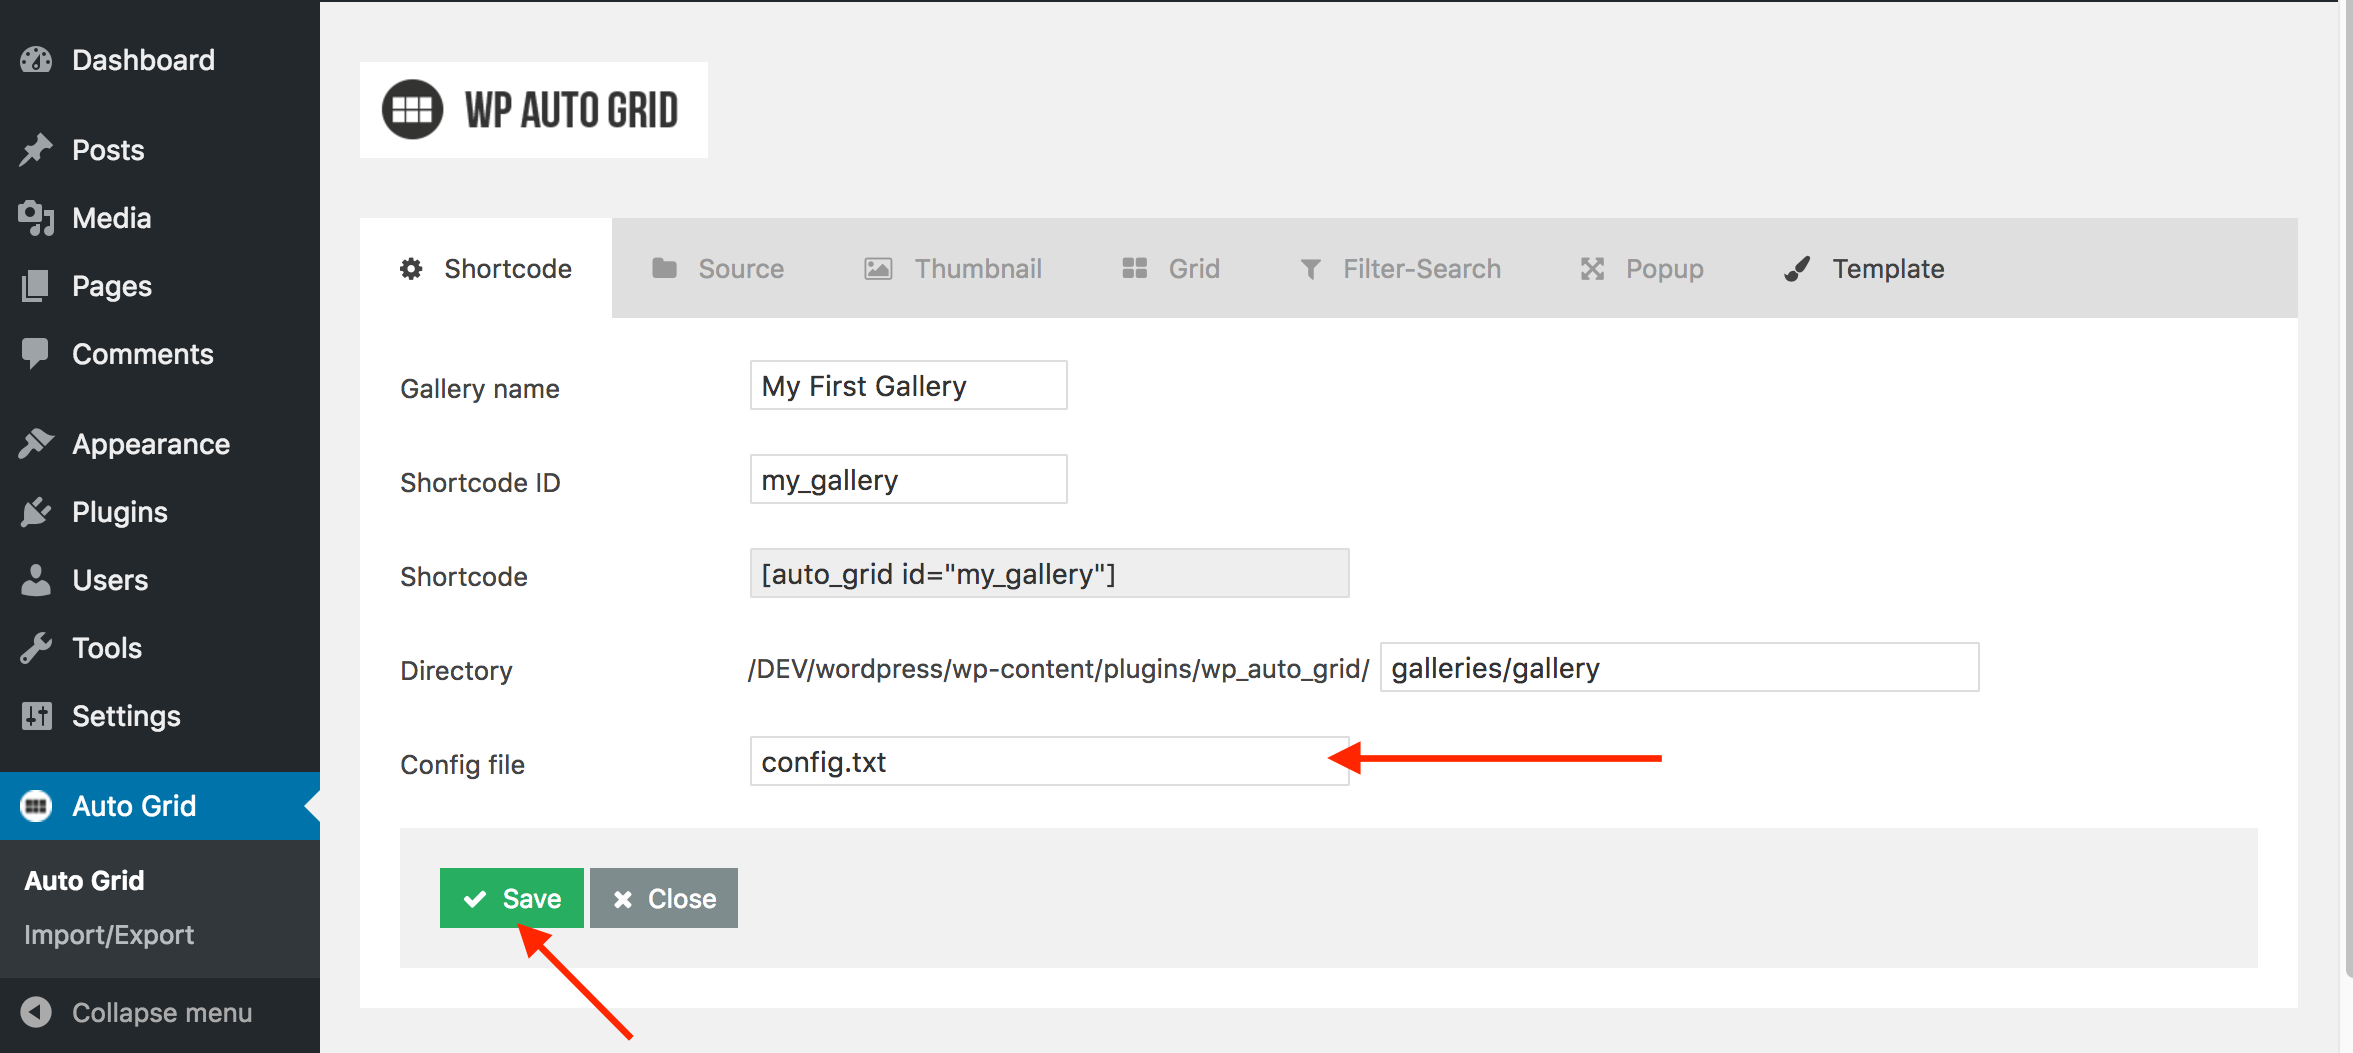
Finally you need to tell the plugin which .txt file to use, and you can do that by passing it in the admin panel as follows (you can leave it empty if you don't want to use a .txt file):
Options
You can play around with all the options in the admin panel, if you put your mouse over any option you'll see a little description about it, so you know what it does.

Template
You may have noticed an option named "template", in there you can specify the HTML of each image/item, you can add/edit/remove HTML, here's an example template:
<div class="media-box-image mb-open-popup" {{link}} data-src="{{popup_src}}" data-title="{{name}}" data-type="{{popup_type}}">
    <div data-thumbnail="{{thumb_src}}" {{ratio}} data-title="{{name}}" data-alt="{{name}}"></div>

    <div class="thumbnail-overlay">

        <div class="thumbnail-overlay-animated" data-from="top">
            <div class="media-box-title">{{name}}</div>
        </div>
        <div class="thumbnail-overlay-animated" data-from="bottom">
            <div class="media-box-date">{{filter}}</div>
        </div>

    </div>
</div>
Each variable is inside double brakets, for example: {{name}} which is the name of the image.
here you can also pull variables from the .txt file, for example if you add a variable in the .txt file like this: text => some random text here you can pull that variable in the template like this: {{text}}. The plugin will take care of replacing that variable with what you have specified in the .txt file
Handy Stuff
When you order the images 'ByName' and you want to control the order of the images just add a-, b-, etc... at beginning of the name of each image (the a-,b-, etc... will not be visible in the gallery):

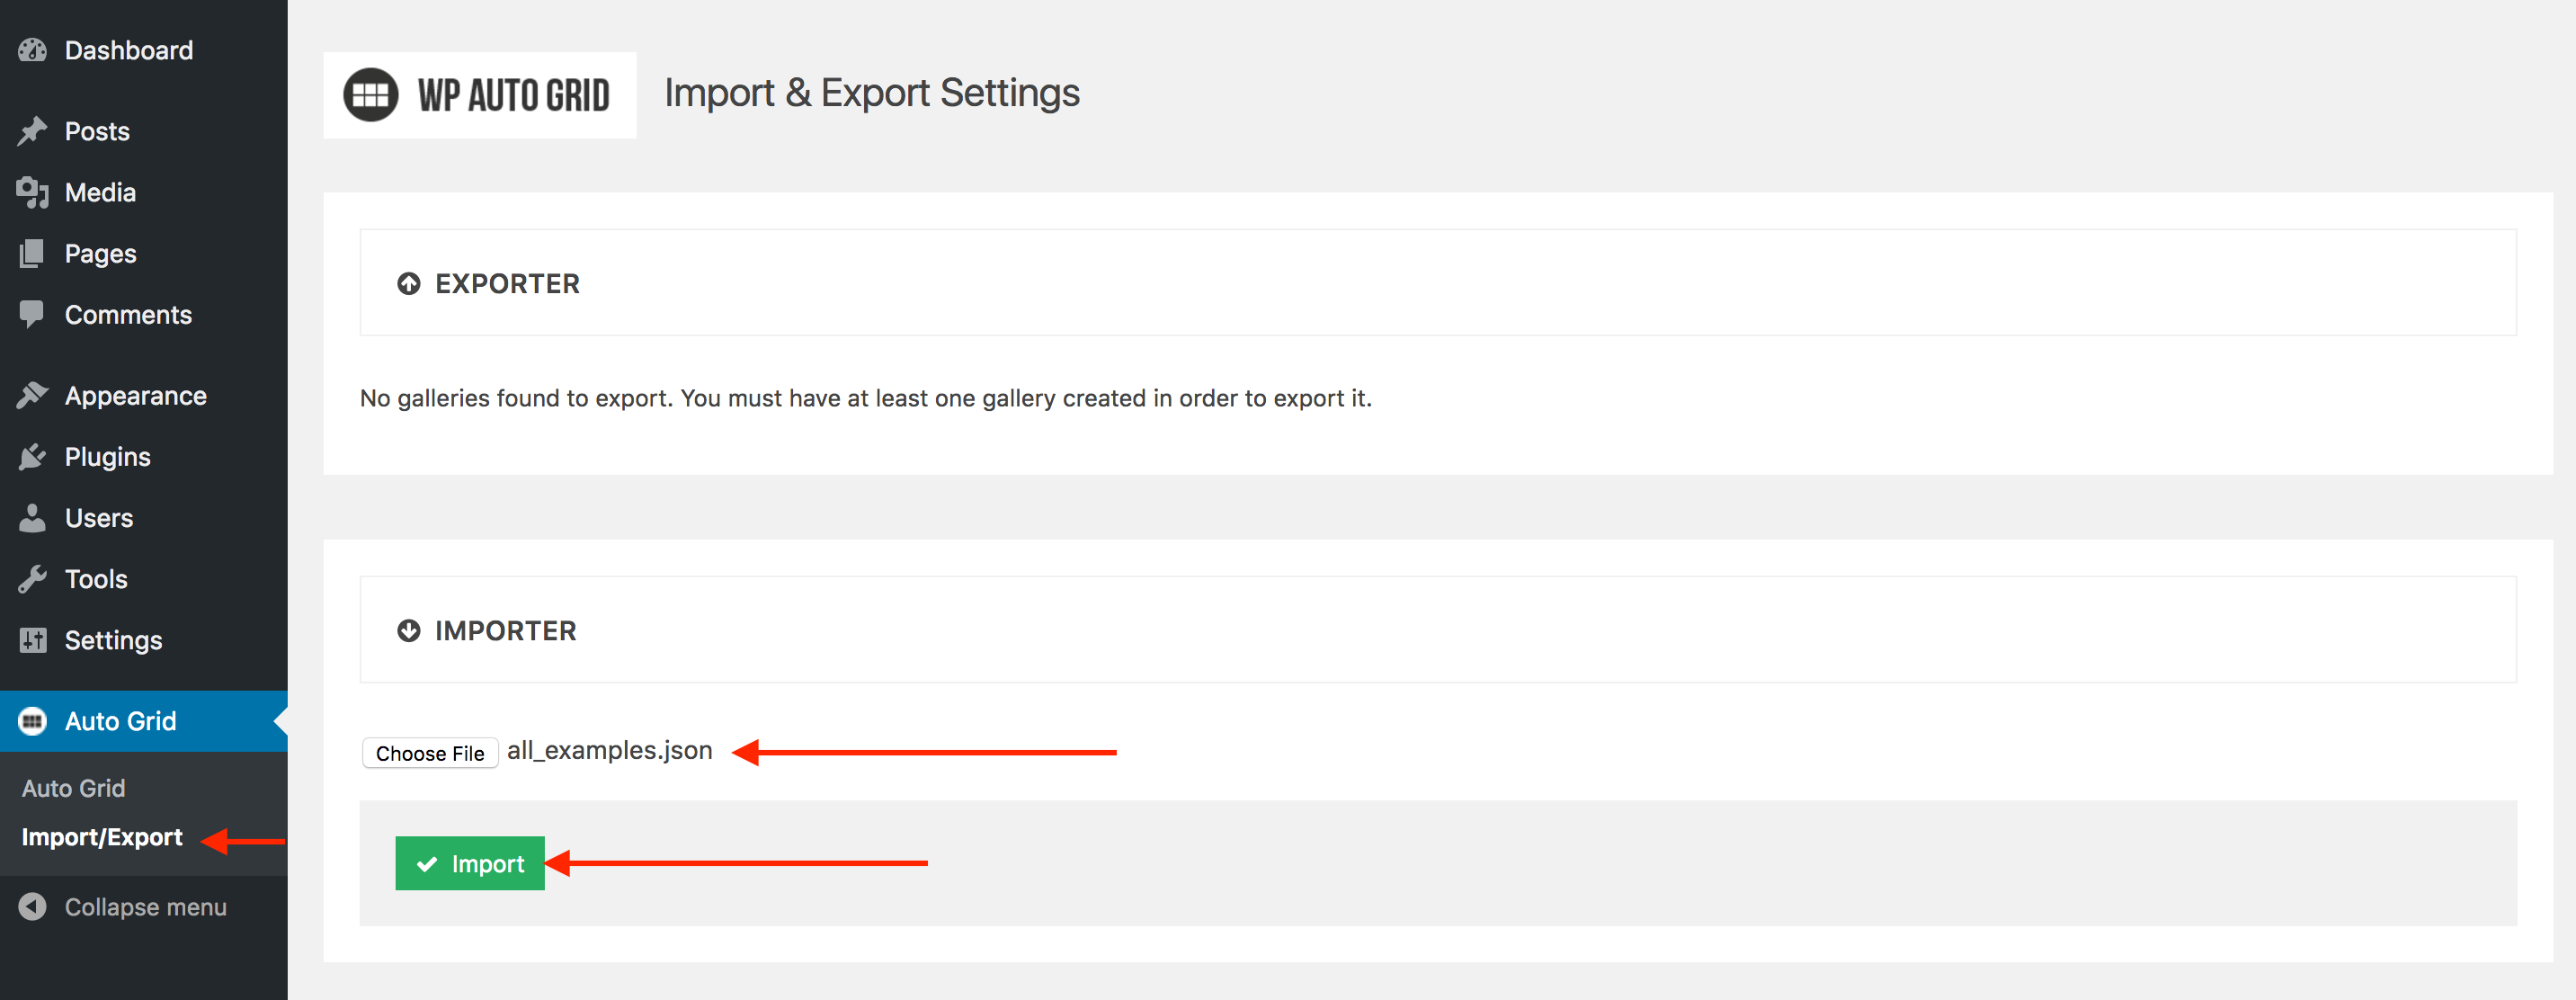
Import & Export
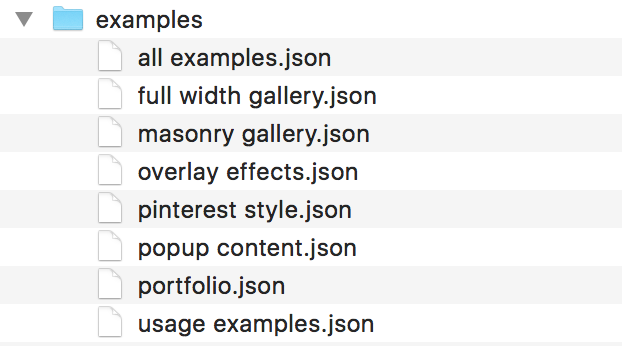
Inside the file you downloaded from CodeCanyon you'll see a folder named "examples" inside that folder you'll find several .json files containing the examples of the live preview of the plugin as follows:
You can import the "all examples.json" file in order to get all the examples into your Wordpress installation, or choose to import only some of them.
You can import examples by going to the "Import/Export" option in the Auto Grid admin panel. Then scroll down to the "IMPORTER" section and select the .json file. Finally click "Import"
You can also export your galleries (in case you wish to import them in another Wordpress installation), in order to do so go to the "EXPORTER" section, choose the galleries you wish to export and click the "Export" button, a .json file will be downloaded to your computer.
